- v50 information can now be added to pages in the main namespace. v0.47 information can still be found in the DF2014 namespace. See here for more details on the new versioning policy.
- Use this page to report any issues related to the migration.
Difference between revisions of "40d:Design strategies"
m (→Bedroom design) |
m (→Bedroom design) |
||
| Line 23: | Line 23: | ||
It may seem obvious to experienced players but it should be stated explicitly: for maximal efficiency your dwarves should spend the least amount of time moving about and the most time doing productive things. Fortress interior design is critical to productivity. | It may seem obvious to experienced players but it should be stated explicitly: for maximal efficiency your dwarves should spend the least amount of time moving about and the most time doing productive things. Fortress interior design is critical to productivity. | ||
| − | ===Bedroom design=== | + | ===[[Bedroom design]]=== |
| − | Enterprising players often try to find a design for their living quarter area which is either very space efficient or easy on the eye. This subject haven't been tackled much yet but you can see the different designs most often used by players of older versions (0.23.130.23a and down) | + | Enterprising players often try to find a design for their living quarter area which is either very space efficient or easy on the eye. This subject haven't been tackled much yet but you can see the different designs most often used by players of older versions (0.23.130.23a and down, see link above). Most of them are still applicable on the newer versions (0.27.169.32a and up) but could possibly be heavily modified to benefit from the new Z-axis stairs placing. |
'''THLawrence's Living Pods''' | '''THLawrence's Living Pods''' | ||
Revision as of 03:15, 19 December 2007
Fortress defense
See fortress defense.
Entrance designs
Flooded entrance
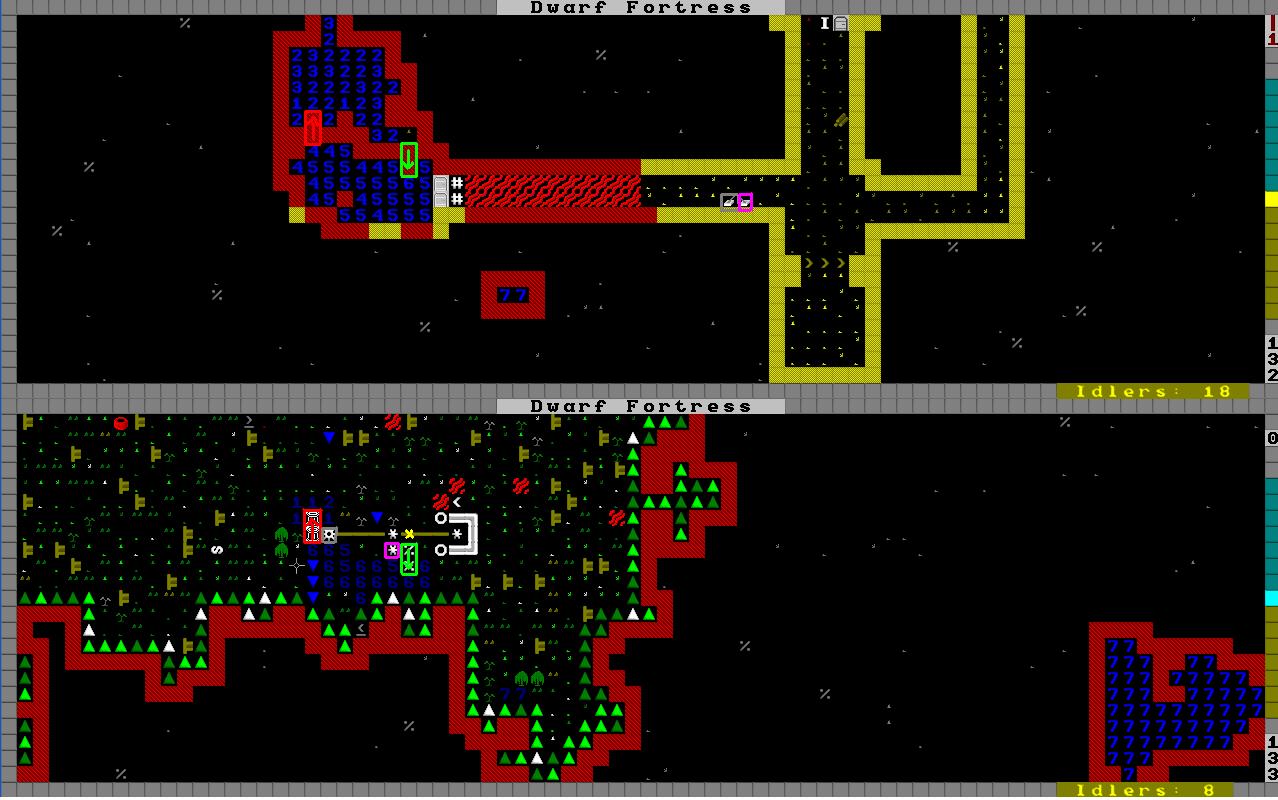
Using a chamber as your entrance alongside a chamber full of water and some machinery you can flood or drain the entrance at will.
The basic premise requires two levers, two screw pumps and two gear assemblies. The amount of power required and the number of additional components needed to get the power to the screw pumps varies depending on distance/setup. One pump is placed to draw from chamber 1 and dump into chamber 2. The other is set in reverse. A gear assembly is placed next to each pump and connected to the main power system. Each gear is linked to a lever. Now at the flip of a switch you can submerge your entrance with water or magma for easy, secure defense against creatures that aren't amphibious or magma-dwelling, depending.
The picture above shows the design in action. The green pump is currently on while the red has been disconnected through the grey marked axle. The yellow X is just to mark that there is a channel under the axle.
3D map format
For more information on how to dig passages and structures in a 3D map, see digging.
Interior design
It may seem obvious to experienced players but it should be stated explicitly: for maximal efficiency your dwarves should spend the least amount of time moving about and the most time doing productive things. Fortress interior design is critical to productivity.
Bedroom design
Enterprising players often try to find a design for their living quarter area which is either very space efficient or easy on the eye. This subject haven't been tackled much yet but you can see the different designs most often used by players of older versions (0.23.130.23a and down, see link above). Most of them are still applicable on the newer versions (0.27.169.32a and up) but could possibly be heavily modified to benefit from the new Z-axis stairs placing.
THLawrence's Living Pods
Apartment Complex:
╔══╦══╦══╦══╗
║..║..║..║..║
║.D╩D.║.D╩D.║
╠═╣X╠═╬═╣X╠═╣
║.D╦D.║.D╦D.║
║..║..║..║..║
╠══╬══╬══╬══╣
║..║..║..║..║
║.D╩D.║.D╩D.║
╠═╣X╠═╬═╣X╠═╣
║.D╦D.║.D╦D.║
║..║..║..║..║
╚══╩══╩══╩══╝
Lobby:
╔══╦══╦══╦══╗..
║..║..║..║..║..
║.D╩D.║.D╩D.║..
╠═╣X╚═╩═╝X╚═╝..
║.D╗...........
║..║...........
╠══╣.....╔══╗..
║..║.....║..║..
║.D╝.....╚D.║..
╠═╣X╔═╦═╗X╠═╣..
║.D╦D.║.D╦D.║..
║..║..║..║..║..
╚══╩══╩══╩══╝..
This design is compact and allows for a large number of rooms. Each room has 3 tiles and a door. To add the apartment complex build it one level above or below the lobby. The design can be stretched to make the rooms 3x2 or 3x3 depending on your preference. Though not as impressive as the fractal patterns it is very efficient in that it can allow for large numbers of dwarves to easily access the main hallway.
Workshop Logistics
At a certain point, the most important thing for your fortress is not that you have workshops, but that they are placed efficiently.
=WWWWWW=WWWWWW=
=iiiiii=iiiiii=
=iiiiii=iiiiii=
=iiiiii=iiiiii=
=oooooo=oooooo=
=oooooo=oooooo=
=oooooo=oooooo=
...............
...............
...............
===============
The idea is that there is a wide hallway at the bottom for easy access for haulers. The workshops are at the top because much less dwarf-hours will be spent moving to the workshop itself than haulers moving to the stockpiles. You pair workshops that have similar inputs or similar outputs or where the output of one is the input of another. Examples: Pair a mechanic's workshop with a mason's workshop because both consume stone and produce furniture. If multiple inputs are required, it is better to split the 3x6 space into specialized stockpiles rather than having a single 'input' stockpile because you want to make sure that there is always some of every input. Use the 'take from stockpile' interface to fill these subsidiary stockpiles from your main stockpile and vice versa.
Another good way to do this is with the stockpiles on the next Z-level, making it slightly more efficient, like this:
Level 0:
===============
=WWWWWW=WWWWWW=
=WWWWWW=WWWWWW=
=WWWWWW=WWWWWW=
...>......>....
===============
Level -1:
===============
=iiiiii=iiiiii=
=iiiiii=iiiiii=
=iiiiii=iiiiii=
=..<...=..<...=
=oooooo=oooooo=
=oooooo=oooooo=
=oooooo=oooooo=
...............
...............
...............
===============
Alternate Workshop Design
One important consideration of workshops includes design to account for moody dwarves. Open workshops might be easy and convenient, but make containment in the case of a berserk dwarf difficult. One such layout that takes this into consideration is as follows:
=========
=WWWXWWW=
=WWW.WWW=
=WWW.WWW=
=.......=
=WWW.WWW=
=WWW.WWW=
=WWW.WWW=
====+====
Key: W: Workshop, X: up/downstaircase, =: wall, +: door.
Stockpiles are placed above and below the room, generally one for raw materials and another for finished materials. Similar workshops can be grouped together for easier checking on, and the door can be locked should a moody dwarf's wishes be unmet.
Fluid workshop locations
Alternatively, you can employ a "work site" methodology where workshops are constructed and destroyed as necessary. For example, if you mine out a huge dining hall and it is completely filled with stone, build a masonry shop in the hall to manufacture tables and chairs. This eliminates the need for a stone hauler because your mason only has to travel a few squares to get raw material. In addition it makes furniture hauling more efficient because the tables and chairs are right next to their eventual location. And of course it clears stone out of your dining hall, eliminating the need for a refuse hauler to dump it all.
Miscellaneous strategies
Use for soil layers
Soil layers (such as clay, loam, etc.) - which may at first seem to be of secondary importance - are very useful for large storage areas, as they do not leave rock behind when dug through and may be excavated much faster by comparison. You can also farm on soil tiles without first making them muddy.
Since soil cannot be smoothed or detailed, it is a less than ideal medium to assign rooms in. Workshops do not have happy thoughts for increased surrounding worth, so if proximity to another area is not an issue, soil is a great place to put them.
Since soil is primarily located near the surface, where a trade depot is often built, it is very useful to dig out large spaces for furniture and finished goods in soil for several reasons. First, it produces no stone, and is thus very fast to dig out. Secondly, having finished goods as close to the trade depot as possible is necessary for efficient trading.
Dams
In Dwarf Fortress, a dam can be built across a river or brook. This has several uses:
- Stop a river from flowing altogether
- Modify a river's path
- Create a pretty lake or functional reservoir
- Create water-based traps
Dam construction
Constructing a dam (probably) requires the draining of a river so walls or floodgates can be built on the river bed. If your map freezes during winter this should be easy.
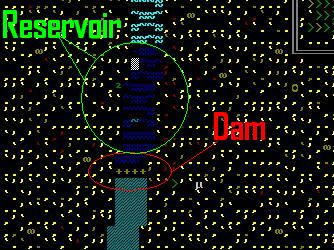
Once the river has been drained you may have to dig into to river bed to be able to place buildings. It will look a bit like this:

After you have access to a river bed simply build a series of walls on top of it, blocking the path of the river. When the water comes back it will fill up the gap as far as it must to let the blocked water flow further. If you build your dam up to the level of the river the water will stop at the dam (it will not overflow). Since this defies logic it may be fixed in future releases.
You can create a massive flood if you build a dam out of floodgates and open them all at once.

