- v50 information can now be added to pages in the main namespace. v0.47 information can still be found in the DF2014 namespace. See here for more details on the new versioning policy.
- Use this page to report any issues related to the migration.
Difference between revisions of "Double-slit method"
(→Preparing the grounds: plural, not singular. There's not even a singular form of "stairs".) |
m (Changed quality rating from "Unrated" to "Exceptional" using the rating script) |
||
| Line 1: | Line 1: | ||
| + | {{Quality|Exceptional|06:13, 17 May 2015 (UTC)}} | ||
{{av}} | {{av}} | ||
| − | + | ||
[[File:Double-slit-name.png|frame|right|The two eponymous slits are highlighted]] | [[File:Double-slit-name.png|frame|right|The two eponymous slits are highlighted]] | ||
Revision as of 06:13, 17 May 2015
v52.04 · v0.47.05 This article is about the current version of DF.Note that some content may still need to be updated. |
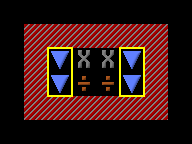
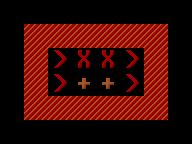
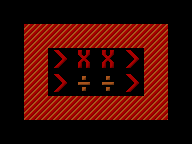
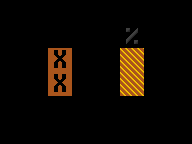
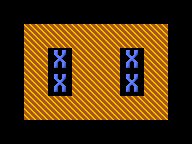
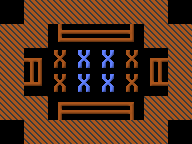
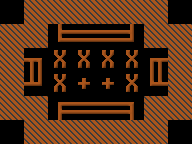
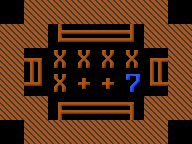
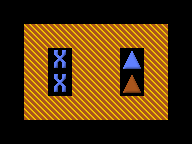
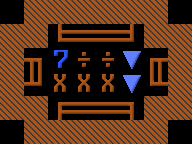
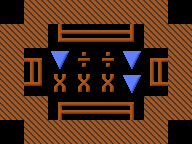
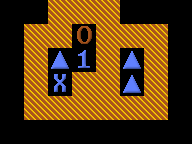
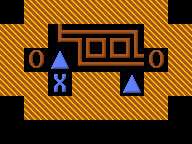
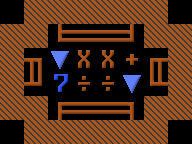
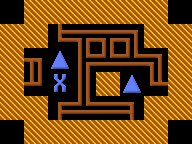
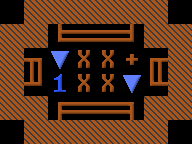
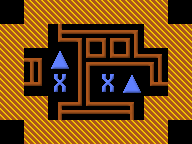
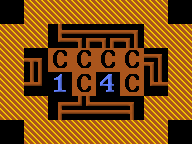
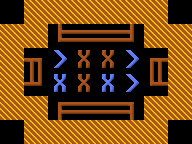
QuantumMenace has developed a very easy method to dig through an aquifer of unknown depth commonly known as the double-slit method. Its name derives from two channeled-out slits at the sides of a 2×2 area.
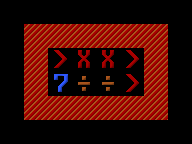
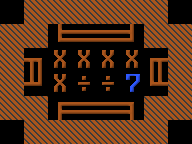
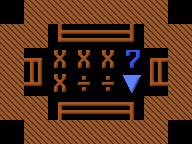
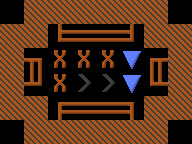
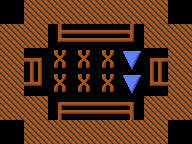
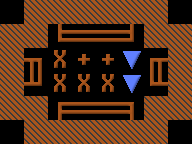
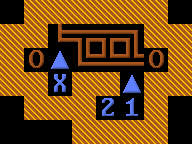
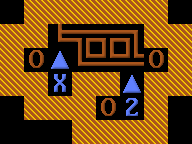
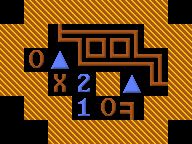
The slits are used to break into the aquifer layer below, hence their ramps are flooded (blue). Water can be pumped from one slit to another slightly faster than the aquifer is flooding it. While a dwarf operates the pump, another dwarf can access the source slit via the ramp and seal off the surrounding walls of the aquifer one by one.
Draining an aquifer
Before we will have a look at the double-slit method itself, it is good to know these basic things about the aquifers and how to drain them.
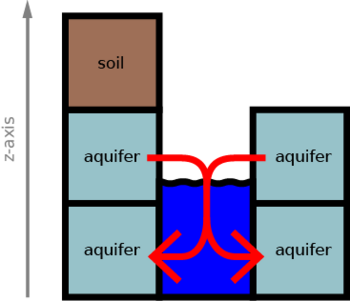
Aquifers produce infinite amounts of water, but they can also absorb infinite amounts of it. We can drain an aquifer into itself either within one z-level or across multiple z-levels.
Draining across multiple z-levels
QuantumMenace's double slit method uses this kind of aquifer draining for all but the lowest aquifer level. Once one of the lower aquifer levels has been cracked open, it can absorb all of the water being produced by the aquifer level above it.
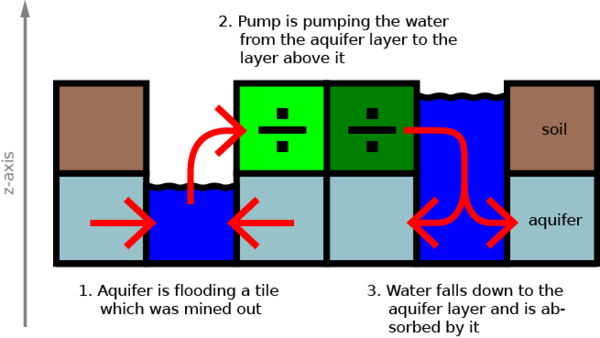
Drain within one z-level
The double-slit method uses this for the lowest aquifer level. Here we pump out the water from a tile being flooded by the aquifer to the level above it (which is already secured) and let it flow back down to another tile where it becomes absorbed by the same aquifer layer again. Note that the target tile of the aquifer must be cracked open (e.g. by downstairs or a channel) to be able to receive water.
Tutorial embark setup
The double-slit method will be presented in a form of a play-along tutorial. Practice it first on an embark which you don't intend to play after you've made it through the aquifer. Try to embark at some forested place near the ocean where multi-level aquifers are almost guaranteed. Take this embark setup:
- 1 Proficient Miner
- 4 Proficient Carpenters
- 2 Proficient Wood cutter
You can sell the anvil, one pick, and all quivers, splints and crutches to buy loads of wooden logs. It will save you time cutting down trees.
Make sure you have at least two battle axes and one pick to cut down trees and mine.
Procedure
Preparation
Using your logs of wood, build a carpenter's workshop and craft all the parts necessary to build a pump, i.e.:
- a block
- an enormous corkscrew
- a pipe section
Find out what you are dealing with
Access the aquifer
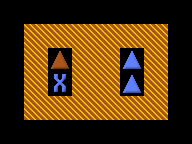
Dig a 2×2 staircase down to the aquifer
Check whether there is more than one level of the aquifer
When digging the up/down stair into the aquifer, better pause the game and use . One-Step to see the revealed tile below the first aquifer level before it gets flooded.
If it says "Damp X" (X is the name of the stone/soil), it is another aquifer level and we proceed dealing with the upper aquifer levels. If it is regular stone (not damp), we will be dealing with the lowest aquifer level.
Dealing with the upper aquifer levels
We want to drain one level of the aquifer into another further below.
Drain the upper aquifer level to the lower one
We need access to the lower aquifer level and crack it open.
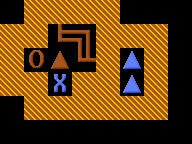
Now we will pump the water from one slit into the other. A pump can only be placed on a floor, not a staircase.
Unfortunately, this pump won't work if there is stairs in its source tile.
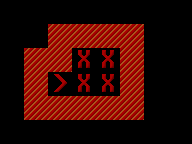
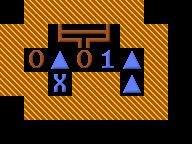
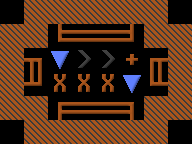
Here, too, you should . One-Step to peek under the second layer of your aquifer to know what you will have to deal with further below. Once the up/down stairs are dug, disassemble the pump, turn it to the other direction and dig more stairs there. (Don't forget to channel out the downstairs in the pump's source tile.) You should end up with something like this:
Now you can stop and dismantle the pump. The upper aquifer level is being drained into the lower one and is accessible without the help of a pump.
Secure the upper aquifer level
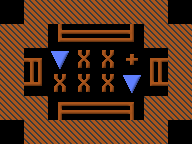
You can now secure the upper aquifer level by cautiously walling it off. The procedure described here takes about one in-game month per level of aquifer. It involves building walls to seal the aquifer off. To build walls more quickly, build them out of blocks, rather than stone or wood. To get the least amount of job cancellations, build them in the order suggested here.
Now the water from the aquifer will start to push your miners and workers around, so better be careful and do this step by step. Expect some job cancellations. You can minimize them by building out of blocks (e.g. wood blocks) rather than normal logs (or stone):
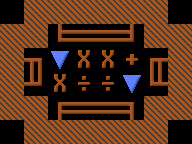
Now you have secured one level of the aquifer. If there are at least two other levels below this one, you can repeat the procedure described in Dealing with the upper aquifer levels. Else, follow the procedure described in Dealing with the lowest aquifer level.
Dealing with the lowest aquifer level
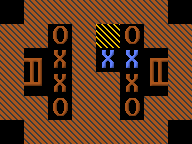
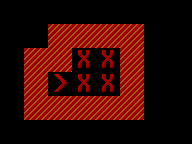
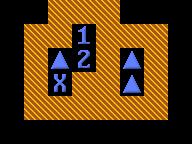
If you have come here after you've been drilling through one or more aquifer levels above, your starting point looks like this:
Or you were just lucky and have encountered only a one-level aquifer. In that case you are starting with this:
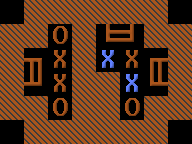
In any case, we must now prepare our grounds for pumping the last aquifer level from one slit to another.
Preparing the grounds
If you have nothing but your probing downstairs, you'll be done with this step in no time:
Once you have this, you can skip the rest of this section and proceed with Walling off the last aquifer level.
If, however, your slits are filled with nothing but up/down stairs, things become more complicated. Pumps cannot pump from a source tile which has stairs. Yet you must keep both slits accessible for your dwarves. Therefore:
Don't dig out both stairs of a slit. The slit must remain accessible at all times. Either via a ramp or via stairs. Only now when you have built the ramp which will serve your dwarf for accessing the slit, you can prepare the next tile of the slit like this:
Now we need to move the pump onto the other pair of stairs, but must be careful to not lose access to this level from above. We proceed this way:
You can now proceed with Walling off the last aquifer level.
Walling off the last aquifer level
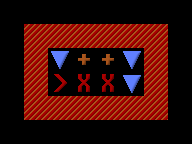
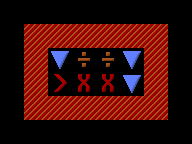
This part will take you 2–3 months in-game time. You start this step with either of these scenarios:
They only differ in a down vs. up/down staircase and constructed vs. natural walls or stairs. The procedure from now is the same for both of them. Since multi-level aquifers are more Fun, we will use the latter one for the rest of this tutorial.
As you will be constructing walls in an aquifer layer, the construction will get suspended very often. Yet every time your carpenters or masons get the chance to touch the wall, its construction will proceed a little bit and will be done eventually. Just be patient and keep unsuspending the work. Constructing these walls out of blocks rather than usual logs or stones speeds it all up considerably.
Keep in mind, that dwarves cannot construct a wall if they only can access it diagonally. Hence you will need to build the hardly accessible walls first. Best you follow this tutorial exactly.
Theoretically, you could now take a shortcut and build a wall instead of the stairs in the south-western corner. Then you would be safe to make an up/down staircase instead of the ramp in the pump's source tile. This would grant you a 1×1 access under your aquifer. You could in turn find a sink for all aquifer levels (e.g. a lake in a cavern) and pierce through the aquifer from below, draining it across multiple z-levels and drill a hole of any size and shape into it. (See a YouTube tutorial video about this in the link section.)
However, you are only a few more steps away from a nice 2×2 stairway through the aquifer (easily extendable to 4×2), so you can as well proceed. It is safer, anyway:
Leave the ramp and stairs in the slit—you will need them both for access and as a water sink. Deconstruct the pump and rebuild it pumping from the other direction (here: pump from the east). You will repeat the procedure mirrored:
Deconstruct the ramp in the source tile of the pump and build a wall there. You will be able to build a wall there right away if you have dug the ramp, rather than constructed it.
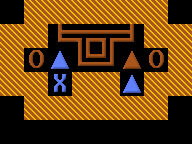
Now the finale. Here we will need to build the pump instead of the two southern up/down staircases. You can build the floor over them right away if they are dug, else you will have to deconstruct them first.
Don't dig or wall the last piece of aquifer in that corner. You will now need it as a sink. Deconstruct the pump and turn it over to pump from the west. For the pump to work, you will need to remove (channel out) the stairs over the pumps source tile.
Now deconstruct the pump and the floor underneath it, you won't need it anymore. The only way how to safely dig the last piece of aquifer is diagonally or from above, because aquifers don't leak that way, therefore:
You are basically done now. The rest of the water will evaporate.
Cleaning up
Once the last aquifer tile is gone, the 7/7 water on the ramp tile will spread and eventually evaporate. It is safe to deconstruct the inner walls and ramps now.
Congratulations to your 4×2 hole through the aquifer. Be very careful not to mine the first non-aquifer layer any wider than your secured staircase dimensions. The aquifer above this level would flood it. Leave at least one layer of stone between your aquifer and the layer where you want some spacy rooms.
Links
- A good youtube tutorial covering this method, taking the shortcut later and working the aquifer from below
- Another Youtube tutorial which doesn't take any shortcuts and works directly from the surface.
- Quantum's original forum post — QuantumMenace improved Hans Lemurson's pump method.
