- v50 information can now be added to pages in the main namespace. v0.47 information can still be found in the DF2014 namespace. See here for more details on the new versioning policy.
- Use this page to report any issues related to the migration.
Difference between revisions of "User:Sphr/SketchUp"
| Line 73: | Line 73: | ||
==Designs== | ==Designs== | ||
| + | todo | ||
| + | possible: | ||
| + | |||
| + | ===Everyday Architecture=== | ||
| + | # Residential/Apartments | ||
| + | # moats/entrances | ||
| + | # stairwells | ||
| + | |||
| + | ===Not So Everyday Architecture=== | ||
| + | #Bolt recycling range | ||
| + | #Ammo recycling ballista range | ||
| + | |||
| + | ===Power/Waterworks=== | ||
| + | |||
| + | ===Magma=== | ||
| + | |||
| + | ===Traps=== | ||
Revision as of 15:25, 2 December 2007
SketchUp Tilesets
original forum thread [1]
rapidshare [2]
Basic Tileset
Download [3]
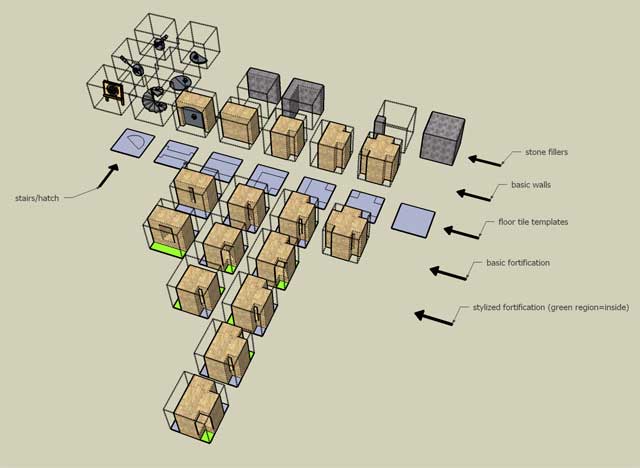
I've made some cleanups to the last version, by separating out the stone fillers (to be used for "half-walls" where at least one side is stone) so that they can be assembled by the actual modeller on demand. This reduces the number of wall tiles. In addition, I've put in a set of simple fortification tiles. I also included an experimental "stylized" fortification which makes more sense by widening the window size on the inside. But this requires trickier placement so the lazy modeller may prefer the basic fortifications that has same window size on all sides.
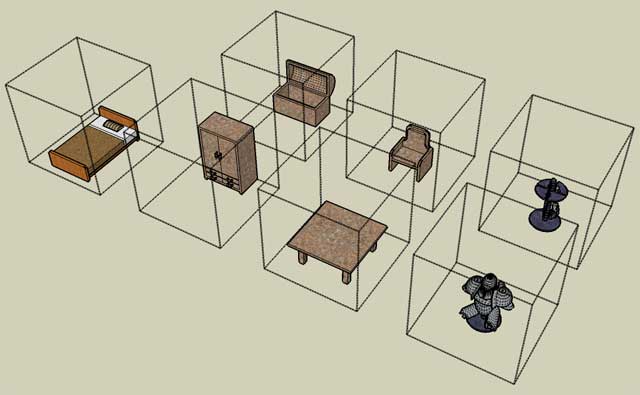
Furniture Tilesets
Download [4]
Drawbridge Tileset
Download [5]
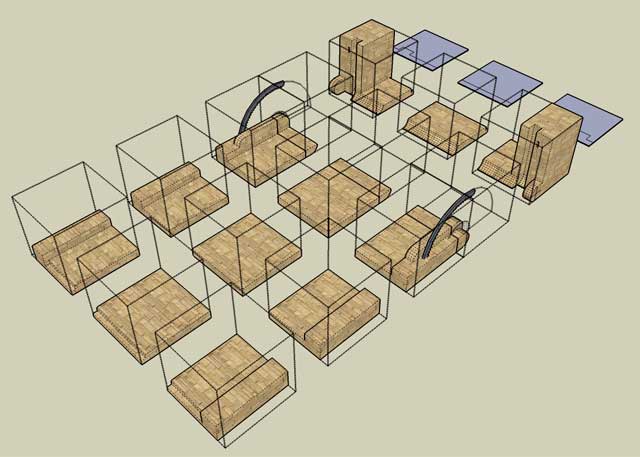
I created this "gear" version of the bridge (it is supposed raised by internal gear networks), partly because chains are tough to work with especially if I want to make the bridge raisable. But gears seems like a more powerful and dwarvish solution. There could possibly be other types/styles of drawbridge tilesets in the future, but I'm rather content with this one :)
Tutorials
Getting started with SketchUp
a few quickies on getting started:
- Download and install google sketchup [6]. Spend some time learning it from the packaged and/or online tutorials. You will need basic sketchup knowledge to use the models.
- Download the basic tileset, unzip and place the .skp somewhere.
- Open a new sketchup document (or when you run sketchup, it starts with a default document). From File->Import->3D (or somewhere there), select the skp file you just unzipped from the file open dialog. This will load the "tileset" as some imported model (pregrouped into one group)
- plonk down the imported model somewhere out of the area you are going to work at, but close enough for you to "copy" any tiles you need.
- Right click on the whole imported tileset group and select "Explode". This will "breakup" the group so that you can copy individual components.
There are several ways you can clone the tiles.
a) The most direct is to simply copy from the actual tile unit from the imported model to where you need. Rotate as needed. (don't do scaling!)
b) The other way is from the menu Window->Components. Here you will see some components that I've named. Only those that starts with "unit:" are the ones you should use. the floor templates however are not components at the moment (I'll tidy up next time), so they don't appear here.
p.s. make sure you turn on View->Hidden Geometry to see the bounding cell, which is required to perfectly align some units into the grid.
The suggested process of building is
1. Create the floor template from the template tiles ( the row of flat squares behind)
2. Copy and move any required units and align them to the floor template.
3. repeat 2 until design finished.
4. (Optional) To generate a nice seamless model (not reversible), select the whole plan (make sure all units selected), (right click and select Explode)x2. This will get rid of the lines that divide the cells.
5. (Optional) cleanup. Delete the tileset if it is no longer needed. To reduce your file size, make sure you open up the Materials as well as Components windows to "delete unused". This will delete all the temporary materials as well as components that isn't used.
Do note that some parts of the models are taken from the 3D warehouse so certain parts belong to the respective owners (in the basic set, the archery target, the spiral stairs and the switch). The rest are ok (done by myself)
Drawbridge Tutorial
Assembling from parts
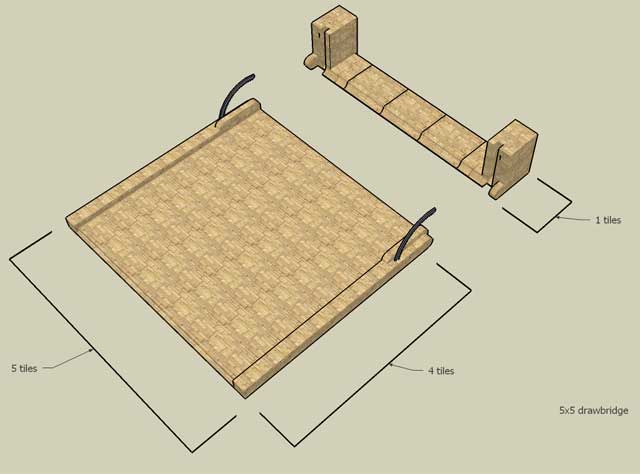
Assemble the bridge and base from the components available from the tilset.
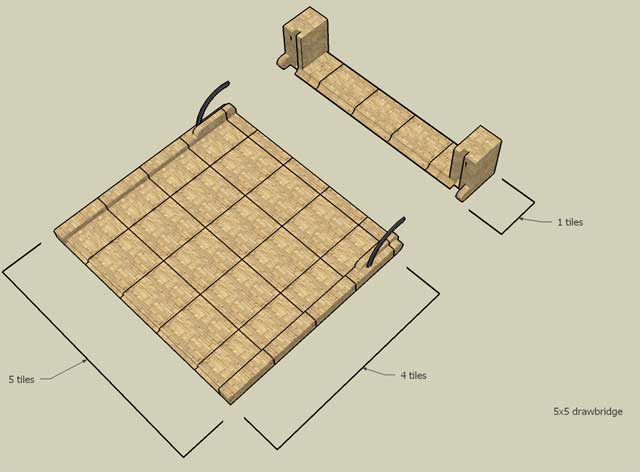
Note that currently, the minimum length and width of a drawbridge that can be built is limited to 2. 1x? and ?x1 bridge will require a separate tilset to represent it properly.
Take note the bridge proper will appear to be 1 tile shorter than the bridge size. This is reserved for the connection to the base, which will make up that 1 tile. This, a 5x5 bridge will seeming be made up of 4x5 actual bridge and 1x5 bridge base.
Creating the bridge
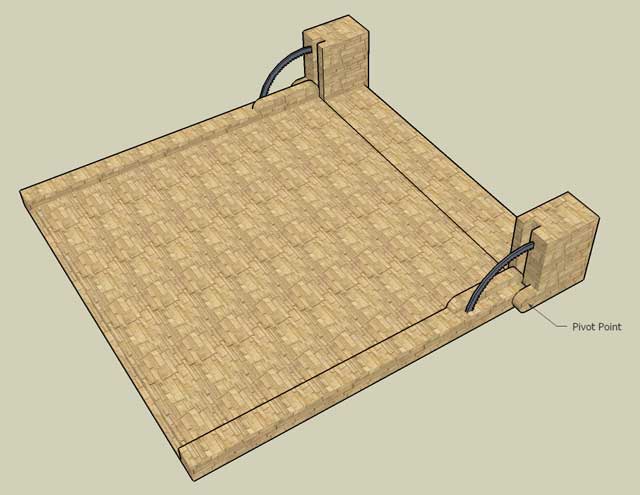
After assembling the parts, to make our drawbridge look nice and possible to be raised in the future, select all the units that makes up the bridge (excluding the base!) in SketchUp. Right click on selected parts and select "Explode", twice. Then Right click on the selected parts again without losing the selection and select "Make Group". This will first merge our bridge units to get rid of the dividing lines and group it into one rigid object so that it is easier to raise later.
Note: you may want to leave the base units unmerged for now, so that they can be merged later with the rest of your fortress instead.
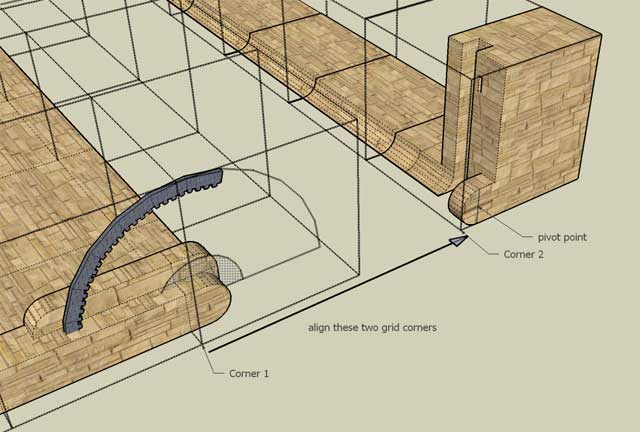
Attaching bridge to base
After the bridge part is joined, align the bridge part to the base as shown in the image. (Make sure Hidden Geometry are shown from the "View" menu, or you won't be able to see the grids and guide lines).
The attached bridge and base.
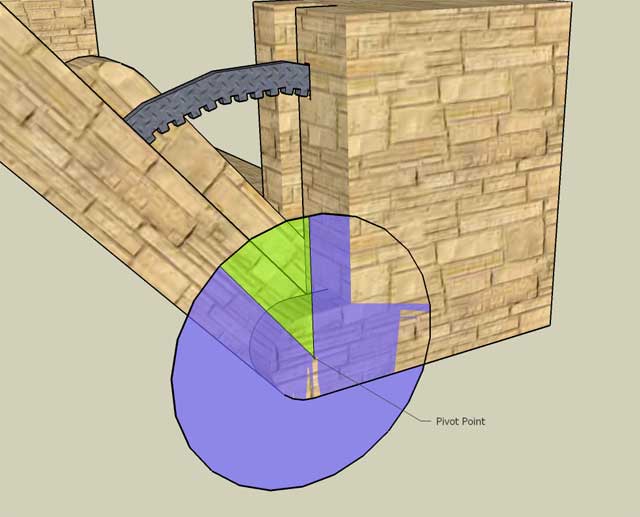
Raising the bridge
To raise the bridge, first make sure that view hidden geometry is on in SketchUp.
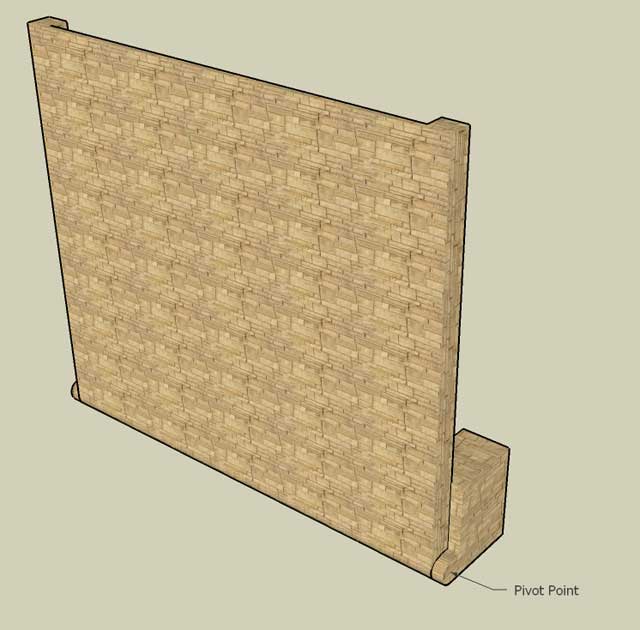
Look carefully at the side unit of the bridge base and you will see a hidden cross. This marks the pivot point we will use to rotate the bridge.
Now, select the bridge part (it should be grouped into a single object from earlier instructions).
Then, press "Q" to enter rotate mode. You should see a protractor that follows your mouse.
Move the protractor to the pivot point. It should snap to it when you are close. Then start rotation there to raise the bridge 90 degrees.
The following shows an idea of how your protractor and rotation should be like. (SketchUp does not export on screen tools. should have used a screen cap instead)
This shows the fully raise bridge.
Designs
todo possible:
Everyday Architecture
- Residential/Apartments
- moats/entrances
- stairwells
Not So Everyday Architecture
- Bolt recycling range
- Ammo recycling ballista range