- v50 information can now be added to pages in the main namespace. v0.47 information can still be found in the DF2014 namespace. See here for more details on the new versioning policy.
- Use this page to report any issues related to the migration.
Difference between revisions of "Screenshot"
m |
m |
||
| Line 23: | Line 23: | ||
====in this wiki==== | ====in this wiki==== | ||
| − | + | upload the file | |
| − | :In the lower left | + | :6w) In the lower left sidebar of any wiki page, in the lower section marked "toolbox", there's a link - "Upload file" - this will open a browser where you select your file and (oddly enough) upload it to the wiki. This creates a new page in the wiki with your file, and your file name. (Consider giving the file on your PC a unique and meaninful name. "7dwarves" or "screenshot" probably aren't good choices!) |
| − | :Copy that image's name, which is the page name minus the first word, "file:". So, if the image is on page "File:Veins revealed.PNG", you want "Veins revealed.PNG". | + | :w7) Copy that image's name, which is the page name minus the first word, "file:". So, if the image is on page "File:Veins revealed.PNG", you want "Veins revealed.PNG". |
| − | :Add that name in double brackets, the same as creating any wiki active link, with the word "Image:", at the front of the image file name. | + | :w8) Add that name in double brackets, the same as creating any wiki active link, with the word "Image:", at the front of the image file name. |
So, adding <nowiki>[[Image:Copper_strike.PNG]]</nowiki> to a page gives this:[[Image:Copper_strike.PNG]] | So, adding <nowiki>[[Image:Copper_strike.PNG]]</nowiki> to a page gives this:[[Image:Copper_strike.PNG]] | ||
| Line 36: | Line 36: | ||
:* align - left, right, or center. | :* align - left, right, or center. | ||
:* caption - adds comments below the image. All wiki editing tags can be used. | :* caption - adds comments below the image. All wiki editing tags can be used. | ||
| + | |||
| + | :w8) Preview the page to make sure the layout, sizing, caption and overall presentation are to your satisfaction... then edit or Save, and you're done. | ||
====in the forum==== | ====in the forum==== | ||
(stand by...) | (stand by...) | ||
Revision as of 18:14, 5 August 2009
This works for any screenshot you want to save, or post on a wiki, forum or elsewhere.
Take the screenshot
1) Make the screen look how you want it. The screenshot will be the whole screen (tho' you can edit if you want.)
2) Hit the Print Screen button.
Okay, now...
Turn into jpeg
3) Open Paint (or the equivalent)
4) Hit ctl + v - yes, you are "pasting" the saved screenshot into paint.
You now have a bitmap of the screenshot. You can edit this as with any bitmap in paint. (Handy for circling key areas, adding arrows, blacking out personal/private info, cropping, whatever.)
5) Under <File>, select <Save As>... a jpg or jpeg. (Or a .png/ping file - similar, and slightly smaller size.)
Linking to a page/post
Then, it depends whether your adding the pic to this wiki or a forum post...
in this wiki
upload the file
- 6w) In the lower left sidebar of any wiki page, in the lower section marked "toolbox", there's a link - "Upload file" - this will open a browser where you select your file and (oddly enough) upload it to the wiki. This creates a new page in the wiki with your file, and your file name. (Consider giving the file on your PC a unique and meaninful name. "7dwarves" or "screenshot" probably aren't good choices!)
- w7) Copy that image's name, which is the page name minus the first word, "file:". So, if the image is on page "File:Veins revealed.PNG", you want "Veins revealed.PNG".
- w8) Add that name in double brackets, the same as creating any wiki active link, with the word "Image:", at the front of the image file name.
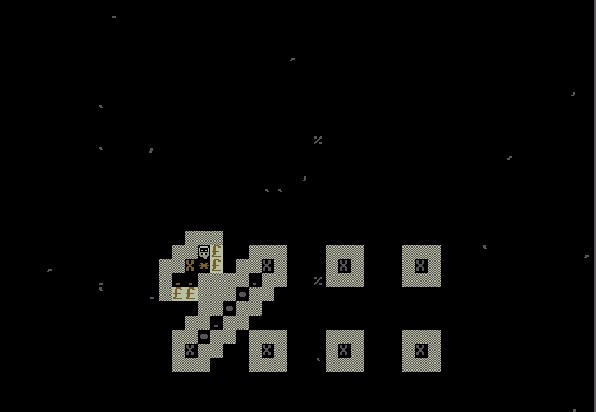
So, adding [[Image:Copper_strike.PNG]] to a page gives this:
That is the actual file, actual size. You can modify that in the wiki using rules found here: [images|http://www.mediawiki.org/wiki/Help:Images images]
- thumb - reduces the file size, making it fit in a wiki article better. Clicking the thumbnail image takes the reader to the actual file page with the full-size image.
- align - left, right, or center.
- caption - adds comments below the image. All wiki editing tags can be used.
- w8) Preview the page to make sure the layout, sizing, caption and overall presentation are to your satisfaction... then edit or Save, and you're done.
in the forum
(stand by...)