- v50 information can now be added to pages in the main namespace. v0.47 information can still be found in the DF2014 namespace. See here for more details on the new versioning policy.
- Use this page to report any issues related to the migration.
Difference between revisions of "Advanced marksdwarf training guide"
(Added hotkey. Macro link.) |
(Removed mention of {{bug|2706}} since it is fixed as of version .50.08 when I tested it.) |
||
| (69 intermediate revisions by 27 users not shown) | |||
| Line 1: | Line 1: | ||
| − | {{Quality| | + | {{migrated article}} |
| − | Marksdwarves | + | {{Quality|Unrated}} |
| + | {{av}} | ||
| + | [[Marksdwarf|Marksdwarves]] can be tricky to equip and [[training|train]] properly for the uninitiated - they often appear to refuse to use their [[crossbow]]s at [[archery range]]s. This guide goes into details explaining known bugs, and getting your marksdwarves to train properly, as well as going into details regarding various ranged weaponry. | ||
| − | == Understanding | + | == Understanding ranged weaponry == |
| − | + | In vanilla ''Dwarf Fortress'', the raws define three types of ranged weapons, each with their own skill and ammo. | |
| − | In vanilla Dwarf Fortress, the raws define three types of ranged weapons, each with their own skill and ammo. | ||
{| class="wikitable" | {| class="wikitable" | ||
| Line 31: | Line 32: | ||
|} | |} | ||
| − | Of these, | + | Of these, dwarves can only craft crossbows and bolts. Bows and blowguns are gained either through trade or recovery from downed enemies. If playing a modded game, replace crossbow in the following with one of the above weapons, and proper ammo type. |
| − | == Equipping | + | == Equipping your marksdwarves == |
| − | === The | + | === The minimum outfit === |
At a minimum, each dwarf requires the following to successfully use the crossbow. | At a minimum, each dwarf requires the following to successfully use the crossbow. | ||
* One crossbow | * One crossbow | ||
* One quiver | * One quiver | ||
| − | * One stack of bolts for each marksdwarf to | + | * One stack of bolts for each marksdwarf to shoot |
| − | A quiver is equipped on the upper body slot. Due to a bug, sometimes a marksdwarf will fail to | + | A quiver is equipped on the upper body slot. Due to a bug, sometimes a marksdwarf will fail to pick up a quiver if wearing heavy armor, a workaround for which is given below. Wood and metal bolts are generated in stacks of 25. Bone bolts are generated in stacks of 5. |
=== Crossbows === | === Crossbows === | ||
| − | Crossbows can be made with wood or bone at a bowyer's workshop, or | + | Crossbows can be made with wood or bone at a bowyer's workshop, or metal at a metalsmith/magma forge. Metal crossbows can be forged out of copper, bronze, bismuth bronze, iron, steel, or adamantine. Quivers must be made of leather at a leatherworks. The base material of a crossbow appears to have no effect on the lethality of ranged bolts. However, when marksdwarves end up in melee, they will use their crossbow to bash. This bash attack utilizes the hammerdwarf skill and deals blunt damage, thus it has been suggested to make dense metal crossbows. |
| − | === Quivers and | + | === Quivers and bolts === |
| − | + | Please note that bolts are assigned to a ''squad'', not to individual dwarves. The number of bolts assigned to a squad will be divided evenly between all occupied squad positions. (For example, if you have a squad of 10 marksdwarves, you need to assign ''at least'' 250 bolts to the squad for each position to equip 25 bolts.) | |
| − | + | Quivers can hold between 25 and 49 bolts, and dwarves will pick up multiple stacks if necessary to reach a number in this range. In other words, dwarves will continue picking up stacks of bolts until they've got at least 25 in their quiver (or they run out of squad-assigned bolt stacks). Bolt stacks are collected in last-in-first-out order (LIFO); that is, dwarves will always go for the newest bolts in your fortress, even if there is an ammo stockpile three steps away from them. Each squad with marksdwarves must be assigned ammo. As they deplete it, the game will automatically add additional ammo to the squad if there is some in the fortress, again following the principle of LIFO. | |
| − | |||
| − | + | === Avoiding equipment issues === | |
| + | The mining, wood cutting, and hunting labors have an "invisible uniform" that conflicts with military equipment. When these labors are enabled, a dwarf will drop all assigned military equipment when going off duty, and when ordered back on duty they spend extra time collecting their equipment, and may ultimately report without some equipment. For that reason, it is recommended that you disable mining, wood cutting, and hunting on all military dwarves. | ||
| − | + | An "[[equipment mismatch]]" error sounds dire, but it's just a diagnostic message telling you that a dwarf's assigned equipment changed while the dwarf was en route to pick up the previously-assigned equipment. In almost all cases the dwarf will automatically collect the newly-assigned equipment without player intervention. One reported cause of frequent equipment mismatch spam is ammo stored in bins. | |
| − | == Setting your | + | == Setting your marksdwarf's barracks == |
| − | === Understanding | + | === Understanding possible training activities === |
| − | The first rule of marksdwarf training is you do | + | The first rule of marksdwarf training is that you do '''not''' assign them a normal [[barracks]] if you wish them to utilize the [[archery target]] for Archer and Marksdwarf XP - if they are assigned to a barracks, they will train as hammerdwarves with their crossbows vs. actually shooting bolts at the archery target. Furthermore, as the game gives precedence to melee training, they will almost never use an archery range, even if one is assigned, if they have a choice. |
When training, a dwarf has four possible options, which they will take in roughly this order: | When training, a dwarf has four possible options, which they will take in roughly this order: | ||
| − | + | * Squad Training (Lead/Watch demonstration) | |
| − | + | * Individual Combat Drill | |
| − | + | * Spar (requires Competent Fighter skill) | |
| − | + | * Archery Training | |
| − | Squad training and sparring require multiple | + | Squad training and sparring require multiple dwarves (and yes, marksdwarves '''will''' spar as long as they are Competent Fighter skill level, training their melee skills while doing so). Except for archery training, dwarves require a standard barracks to conduct any of the above activities. Notably, it is possible to actually train marksdwarves via demonstration, both Crossbow and Archery skills being trainable this way. By combining this with training orders, it is possible to make archery training the only valid option, and thus get them to train consistently. |
| − | === Building | + | === Building archery ranges === |
| − | Thus, the first step is to build a room with a bunch of archery | + | Thus, the first step is to build a room with a bunch of archery targets, it is recommended to build one archery target per filled squad position (multiple marksdwarves cannot train at the same archery target concurrently). The room must be large enough that the marksdwarf has a one-gap space between them and the target; some people just make their "barracks" 10x10, and put an ammo stockpile in it. Notably, (and this is a change from previous versions) the dwarves ''must'' be able to walk up to the target; placing a channel in front of it will prevent them from training. |
| − | Once you build your range, you must define it as a room. Make it so it touches the far wall, and don't worry, range rooms can overlap. You have to do this for each. Make sure the shooting direction is correct! In addition, your marksdwarf squad | + | Once you build your range ({{k|b}}-{{k|A}}), you must define it as a room ({{k|q}}-{{k|r}}). Make it so it touches the far wall, and don't worry, range rooms can overlap. You have to do this for each archery target. Make sure the shooting direction is correct! In addition, your marksdwarf squad '''must''' at minimum have train set on each archery target with ({{k|q}}-{{k|t}}). Again, only one marksdwarf can use a target at any given time. |
| − | [[File: | + | [[File:Archery_target_setup.png|A properly setup archery target]] |
| + | Repeat this for each range; you will have 1-10 targets overlapping each other and assigned to your marksdwarf squad (in these screenshots, they are "The Delights of Gold") | ||
| − | + | ===The military management screen=== | |
| − | + | This is by far the most difficult part - the {{K|m}}ilitary menu is confusing on the best days, but this guide will walk you through it. (To some people, this screen is designed upside down: the options to switch 'pages' or 'tabs' on this menu are at the bottom, and the specific detailed commands for the current page/tab are at the top. We will use 'page'.) | |
| − | + | Ignore the default page '''{{DFtext|p|2:1}}{{DFtext|: Positions|3:1:1}}''' page for now, because you want to make the right '''{{DFtext|n|2:1}}{{DFtext|: Uniforms|7:1}}''' for your marksdwarves. | |
| − | + | ====Uniforms==== | |
| + | Press {{K|n}} to bring up the uniforms screen. Do yourself a favor and just scroll down and {{K|d}}elete the default 'archer' uniform. It's wrong and will not work properly. | ||
| − | Create a new uniform with {{K|c}} | + | Create a new uniform with {{K|c}}. |
| − | |||
| − | |||
| − | |||
| − | |||
| − | |||
| − | |||
| − | |||
| − | + | You will use the hotkeys seen on the 2nd row from the top of the {{K|m}} screen, and to create the following uniform: | |
| + | * {{K|A}}rmor: leather armor | ||
| + | * {{K|L}}egs: leather legwear | ||
| + | * {{K|H}}elm: leather headwear | ||
| + | * {{K|G}}loves: leather handwear | ||
| + | * {{K|B}}oots: leather footwear | ||
| + | * {{K|S}}hield: shields/bucklers | ||
| + | * {{K|W}}eapon: crossbows (do NOT use individual choice, ranged; you '''will''' end up with dwarves who think an ''axe'' is a ranged weapon) :p | ||
| − | Here's what it should like if you did it right: | + | Navigation is ''tricky'', so let's do the first 3 selections together: |
| + | # {{K|A}}rmor to show the {{DFtext| |7:7:1}}{{dftext|SELECTION|7:7:1}}{{DFtext| |7:7:1}} list of Armor items | ||
| + | ## Navigate {{K|→}} to the {{DFtext| |7:7:1}}{{dftext|SELECTION|7:7:1}}{{DFtext| |7:7:1}} list | ||
| + | ## Use the {{k|↑}}/{{k|↓}} and {{K|Enter}} to select "leather armor". You should now see "leather armor" listed under {{DFtext| |7:7:1}}{{dftext|SELECTION|7:7:1}}{{DFtext| |7:7:1}} list in the center of the screen. | ||
| + | ## Ok, that was the '''easy''' one. So follow these steps CLOSELY. | ||
| + | # {{K|L}}egs to show the to show the {{DFtext| |7:7:1}}{{dftext|SELECTION|7:7:1}}{{DFtext| |7:7:1}} list of Leg items | ||
| + | ## Use the {{k|↑}}/{{k|↓}} and {{K|Enter}} to select "legwear". You should now see "legwear" listed under "leather armor" under {{DFtext| |7:7:1}}{{dftext|SELECTION|7:7:1}}{{DFtext| |7:7:1}} list. BUT... the green {{dftext|leather armor|3:1}} means it is the selection from that column. | ||
| + | ## Navigate back {{k|←}}/{{k|↓}} to highlight {{dftext|legwear|3:1}} | ||
| + | ## {{K|M}}aterial to reveal the material options that will appear under the {{DFtext| |7:7:1}}{{dftext|SELECTION|7:7:1}}{{DFtext| |7:7:1}} column. | ||
| + | ## Navigate {{K|→}} to the {{DFtext| |7:7:1}}{{dftext|SELECTION|7:7:1}}{{DFtext| |7:7:1}} list | ||
| + | ## Use the {{k|↑}}/{{k|↓}} and {{K|Enter}} to select "leather" material. You should now see {{dftext|leather legwear|3:1}} listed under {{DFtext| |7:7:1}}{{dftext|SELECTION|7:7:1}}{{DFtext| |7:7:1}} list in the center of the screen. | ||
| + | # Now {{K|H}}elm to get your leather headwear | ||
| + | ## Use the {{k|↑}}/{{k|↓}} and {{K|Enter}} to select "headware". (It may be the first option, so just hit {{K|Enter}}) | ||
| + | ## Navigate back {{k|←}}/{{k|↓}} to highlight {{dftext|headware|3:1}} | ||
| + | ## {{K|M}}aterial to reveal the material options that will appear under the {{DFtext| |7:7:1}}{{dftext|SELECTION|7:7:1}}{{DFtext| |7:7:1}} column. | ||
| + | ## Navigate {{K|→}} to the {{DFtext| |7:7:1}}{{dftext|SELECTION|7:7:1}}{{DFtext| |7:7:1}} list | ||
| + | ## Use the {{k|↑}}/{{k|↓}} and {{K|Enter}} to select "leather" material. You should now see {{dftext|leather headwear|3:1}} listed under {{DFtext| |7:7:1}}{{dftext|SELECTION|7:7:1}}{{DFtext| |7:7:1}} list in the center of the screen. | ||
| + | |||
| + | Be careful of hitting Enter at the wrong time and duplicating or deleting an entry. Here's what it should look like if you did it right: | ||
[[File:Working_training_uniform.png|400px|Uniform that gets them training]] | [[File:Working_training_uniform.png|400px|Uniform that gets them training]] | ||
| + | Now press {{K|m}} to switch from "Partial matches" to "Exact matches" in the upper right. This appears to fix most of the issues that result in your dwarves not picking up quivers. You might be able to get away with {{k|r}} "Over clting", which means the dwarves will wear this uniform over their current clothing. | ||
| + | |||
| + | At this point you have created the concept of a uniform, but you have not yet told your squad to wear this uniform. | ||
| + | |||
| + | Proceed to the next section. | ||
| + | |||
| + | ===Positions=== | ||
| + | Now press {{K|p}} to go back to the positions menu. If you are creating {{K|l}} a new squad, it will prompt for a uniform, before showing a list of Vacant Squad positions and Candidates. | ||
| + | |||
| + | After selecting your recruits, switch to the {{K|e}} menu. Select your squad, then press {{K|U}} (that's capital U) to bring up the {{K|U}}niform selection screen. | ||
| − | + | NOTE: If a position (for example, commander/captain) is highlighted when you hit the {{K|U}}niform selection screen, your selection will ONLY apply to that individual soldier. | |
| + | Hit {{K|shift}} + {{K|enter}} to make sure you are assigning it to all positions in the squad. | ||
| − | + | You can also look at the top of the screen to see what your dwarves will train as (i.e. 10/10 Marksdwarves, instead of 1/1 markdwarf 9/9 wrestlers). | |
[[File:10_marksdwarves.png|400px|10/10 Marksdwarves]] | [[File:10_marksdwarves.png|400px|10/10 Marksdwarves]] | ||
| − | === Handling | + | === Handling ammo === |
We're almost done. Go to the ammo screen. | We're almost done. Go to the ammo screen. | ||
| + | |||
| + | (Note: This isn't possible in Steam version. There is no ammo screen) | ||
[[File:ammo_screen.png|400px|Ammo]] | [[File:ammo_screen.png|400px|Ammo]] | ||
| − | If you're setting this by hand, here's what to know. Each squad needs the correct ammo. Bolts are assigned on a "per-item" basis, i.e., a given stack of bolts | + | If you're setting this by hand, here's what to know. Each squad needs the correct ammo. Bolts are assigned on a "per-item" basis, i.e., a given stack of bolts that's marked for training will only be used for training and vice versa. |
| − | + | By default the top slot reserves ammunition for hunters. If you don't have any hunters you may want to remove that reservation from the ammunition screen to free up those bolts for your military. | |
| − | |||
| − | |||
| − | |||
| − | |||
| + | === Squad training orders === | ||
Now, for the magic bit that gets them doing nothing *but* training. Open the schedule screen with {{K|s}} and look at the orders. The default is "Train, 10 minimium". '''This is WRONG!''' | Now, for the magic bit that gets them doing nothing *but* training. Open the schedule screen with {{K|s}} and look at the orders. The default is "Train, 10 minimium". '''This is WRONG!''' | ||
| Line 127: | Line 158: | ||
[[File:No_orders.png|400px|no_orders]] | [[File:No_orders.png|400px|no_orders]] | ||
| − | Press {{K|o}} to pull up the give order screen. Press {{K|o}} until 'Train' is set, and then press {{K|+}} so it shows minimum 1, like this. Then press shift- | + | Press {{K|o}} to pull up the give order screen. Press {{K|o}} until 'Train' is set, and then press {{K|+}} so it shows minimum 1, like this. Then press shift-enter to give the order. The screen will look like this: |
[[File:Train_1.png|400px|train 1]] | [[File:Train_1.png|400px|train 1]] | ||
| Line 137: | Line 168: | ||
[[File:multiple_train_1.png|400px|Multiple train one orders]] | [[File:multiple_train_1.png|400px|Multiple train one orders]] | ||
| − | Copy and paste the order to all the months. You can also set Sleep in | + | Copy and paste the order to all the months. You can also set Sleep in Barracks at need to increase their training time, though this will raise the stress levels of dwarves in the squad due to tired thoughts. |
You're almost done. Activate your squad, and after they finish picking up equipment, watch your bolt supplies vanish as your marksdwarves do nothing *but* archery training. | You're almost done. Activate your squad, and after they finish picking up equipment, watch your bolt supplies vanish as your marksdwarves do nothing *but* archery training. | ||
| − | === Why | + | === Why this works === |
| − | Squad training and | + | Squad training and sparring require multiple dwarves (and yes, marksdwarves *will* spar as long as they're Competent Fighters). Training, minimum of 1 forces them to work solo. Since they don't have a normal barracks, they can't drill, which leaves archery training as the only possible way to train. Since reloading on marksdwarves continues to be erratic, they'll frequently report "No Orders" or similar once they've finished archery training; until the game notices that a given dwarf is out of ammo, in which case they'll go pick up more. |
| + | |||
| + | Archery target training grants 5x less experience than live fire (6XP per bolt at archery target vs. 30XP per bolt on live targets), but no micromanagement, no hauling, one setup, and you can ignore it until you get that glorious announcement that Urist McMarksdwarf has become an Elite Marksdwarf. | ||
| − | + | == Stopping melee charges == | |
| + | Do '''not''' use the [[Scheduling#Stations|station scheduling order]]! | ||
| − | + | When a dwarf has line of sight on an enemy, they'll do one of two things: run away; or run up and fight. While they're running up to the enemy, dwarves will shoot bolts if they have any, but then engage the enemy using their crossbows as hammers instead of shooting. Therefore, it's imperative that you create physical barriers which make it impossible for your marksdwarves to charge the enemy. Nothing else will suffice. | |
| − | The | + | Some sources claim a Defend Burrows order may restrict marksdwarves to the area defined by the burrow. The full effectiveness of Defend Burrow orders at stopping a melee charge is unknown.{{verify}} |
| − | + | The easiest way to accomplish this is to use fortification pillboxes (also known as [[archery tower]]s), with a [[Scheduling#Orders|patrol order]] that causes them to break line of sight. | |
| − | For patrol routes, marksdwarves | + | For patrol routes, marksdwarves will not reliably take a Pickup Equipment order as long as they have line of sight on their enemy; they will usually stand there and glare. Have them go through a door or something, and as soon as they lose sight of the goblin/forgotten beast/demon, they'll immediately go find bolts and reload. |
| − | + | An alternative approach is to forego all of this scheduling stuff, and use direct move orders. Station (move) your marksdwarves to the spot where you want them to stand, making sure that this spot is physically separated from the enemy. Remember that each dwarf will actually select a random spot within 3 tiles of your station-spot, on the same Z level, and try to walk to that spot. Make sure every such reachable spot is on ''your'' side of the fortifications. | |
| + | |||
| + | In all cases, you must remember that dwarves '''can and will climb''' walls or fortifications to reach the enemy. To prevent marksdwarves from suicide-diving over the fortifications onto the killing ground below, build a roof (a [[floor]] on the next Z-level up) to physically block their vertical movement. | ||
{{Military}} | {{Military}} | ||
| + | |||
| + | {{Category|Military}} | ||
| + | {{Category|Guides}} | ||
Latest revision as of 21:07, 19 June 2023
| This article was migrated from DF2014:Advanced marksdwarf training guide and may be inaccurate for the current version of DF (v50.12). See this page for more information. |
v50.12 · v0.47.05 This article is about the current version of DF.Note that some content may still need to be updated. |
Marksdwarves can be tricky to equip and train properly for the uninitiated - they often appear to refuse to use their crossbows at archery ranges. This guide goes into details explaining known bugs, and getting your marksdwarves to train properly, as well as going into details regarding various ranged weaponry.
Understanding ranged weaponry[edit]
In vanilla Dwarf Fortress, the raws define three types of ranged weapons, each with their own skill and ammo.
| Ranged Weapons | |||
|---|---|---|---|
| Ranged Weapon | Ranged Skill | Melee Skill | Ammo |
| Crossbow | Marksdwarf | Hammerdwarf | Bolts |
| Bow | Bowman | Swordman | Arrows |
| Blowgun | Blowgunner | Swordman | Darts |
Of these, dwarves can only craft crossbows and bolts. Bows and blowguns are gained either through trade or recovery from downed enemies. If playing a modded game, replace crossbow in the following with one of the above weapons, and proper ammo type.
Equipping your marksdwarves[edit]
The minimum outfit[edit]
At a minimum, each dwarf requires the following to successfully use the crossbow.
- One crossbow
- One quiver
- One stack of bolts for each marksdwarf to shoot
A quiver is equipped on the upper body slot. Due to a bug, sometimes a marksdwarf will fail to pick up a quiver if wearing heavy armor, a workaround for which is given below. Wood and metal bolts are generated in stacks of 25. Bone bolts are generated in stacks of 5.
Crossbows[edit]
Crossbows can be made with wood or bone at a bowyer's workshop, or metal at a metalsmith/magma forge. Metal crossbows can be forged out of copper, bronze, bismuth bronze, iron, steel, or adamantine. Quivers must be made of leather at a leatherworks. The base material of a crossbow appears to have no effect on the lethality of ranged bolts. However, when marksdwarves end up in melee, they will use their crossbow to bash. This bash attack utilizes the hammerdwarf skill and deals blunt damage, thus it has been suggested to make dense metal crossbows.
Quivers and bolts[edit]
Please note that bolts are assigned to a squad, not to individual dwarves. The number of bolts assigned to a squad will be divided evenly between all occupied squad positions. (For example, if you have a squad of 10 marksdwarves, you need to assign at least 250 bolts to the squad for each position to equip 25 bolts.)
Quivers can hold between 25 and 49 bolts, and dwarves will pick up multiple stacks if necessary to reach a number in this range. In other words, dwarves will continue picking up stacks of bolts until they've got at least 25 in their quiver (or they run out of squad-assigned bolt stacks). Bolt stacks are collected in last-in-first-out order (LIFO); that is, dwarves will always go for the newest bolts in your fortress, even if there is an ammo stockpile three steps away from them. Each squad with marksdwarves must be assigned ammo. As they deplete it, the game will automatically add additional ammo to the squad if there is some in the fortress, again following the principle of LIFO.
Avoiding equipment issues[edit]
The mining, wood cutting, and hunting labors have an "invisible uniform" that conflicts with military equipment. When these labors are enabled, a dwarf will drop all assigned military equipment when going off duty, and when ordered back on duty they spend extra time collecting their equipment, and may ultimately report without some equipment. For that reason, it is recommended that you disable mining, wood cutting, and hunting on all military dwarves.
An "equipment mismatch" error sounds dire, but it's just a diagnostic message telling you that a dwarf's assigned equipment changed while the dwarf was en route to pick up the previously-assigned equipment. In almost all cases the dwarf will automatically collect the newly-assigned equipment without player intervention. One reported cause of frequent equipment mismatch spam is ammo stored in bins.
Setting your marksdwarf's barracks[edit]
Understanding possible training activities[edit]
The first rule of marksdwarf training is that you do not assign them a normal barracks if you wish them to utilize the archery target for Archer and Marksdwarf XP - if they are assigned to a barracks, they will train as hammerdwarves with their crossbows vs. actually shooting bolts at the archery target. Furthermore, as the game gives precedence to melee training, they will almost never use an archery range, even if one is assigned, if they have a choice.
When training, a dwarf has four possible options, which they will take in roughly this order:
- Squad Training (Lead/Watch demonstration)
- Individual Combat Drill
- Spar (requires Competent Fighter skill)
- Archery Training
Squad training and sparring require multiple dwarves (and yes, marksdwarves will spar as long as they are Competent Fighter skill level, training their melee skills while doing so). Except for archery training, dwarves require a standard barracks to conduct any of the above activities. Notably, it is possible to actually train marksdwarves via demonstration, both Crossbow and Archery skills being trainable this way. By combining this with training orders, it is possible to make archery training the only valid option, and thus get them to train consistently.
Building archery ranges[edit]
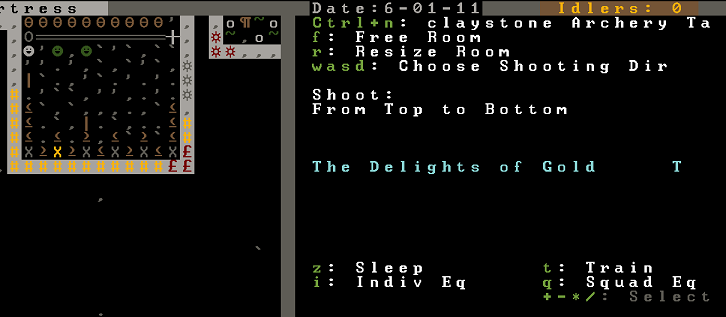
Thus, the first step is to build a room with a bunch of archery targets, it is recommended to build one archery target per filled squad position (multiple marksdwarves cannot train at the same archery target concurrently). The room must be large enough that the marksdwarf has a one-gap space between them and the target; some people just make their "barracks" 10x10, and put an ammo stockpile in it. Notably, (and this is a change from previous versions) the dwarves must be able to walk up to the target; placing a channel in front of it will prevent them from training.
Once you build your range (b-A), you must define it as a room (q-r). Make it so it touches the far wall, and don't worry, range rooms can overlap. You have to do this for each archery target. Make sure the shooting direction is correct! In addition, your marksdwarf squad must at minimum have train set on each archery target with (q-t). Again, only one marksdwarf can use a target at any given time.
Repeat this for each range; you will have 1-10 targets overlapping each other and assigned to your marksdwarf squad (in these screenshots, they are "The Delights of Gold")
The military management screen[edit]
This is by far the most difficult part - the military menu is confusing on the best days, but this guide will walk you through it. (To some people, this screen is designed upside down: the options to switch 'pages' or 'tabs' on this menu are at the bottom, and the specific detailed commands for the current page/tab are at the top. We will use 'page'.)
Ignore the default page p: Positions page for now, because you want to make the right n: Uniforms for your marksdwarves.
Uniforms[edit]
Press n to bring up the uniforms screen. Do yourself a favor and just scroll down and delete the default 'archer' uniform. It's wrong and will not work properly.
Create a new uniform with c.
You will use the hotkeys seen on the 2nd row from the top of the m screen, and to create the following uniform:
- Armor: leather armor
- Legs: leather legwear
- Helm: leather headwear
- Gloves: leather handwear
- Boots: leather footwear
- Shield: shields/bucklers
- Weapon: crossbows (do NOT use individual choice, ranged; you will end up with dwarves who think an axe is a ranged weapon) :p
Navigation is tricky, so let's do the first 3 selections together:
- Armor to show the SELECTION list of Armor items
- Navigate → to the SELECTION list
- Use the ↑/↓ and Enter to select "leather armor". You should now see "leather armor" listed under SELECTION list in the center of the screen.
- Ok, that was the easy one. So follow these steps CLOSELY.
- Legs to show the to show the SELECTION list of Leg items
- Use the ↑/↓ and Enter to select "legwear". You should now see "legwear" listed under "leather armor" under SELECTION list. BUT... the green leather armor means it is the selection from that column.
- Navigate back ←/↓ to highlight legwear
- Material to reveal the material options that will appear under the SELECTION column.
- Navigate → to the SELECTION list
- Use the ↑/↓ and Enter to select "leather" material. You should now see leather legwear listed under SELECTION list in the center of the screen.
- Now Helm to get your leather headwear
- Use the ↑/↓ and Enter to select "headware". (It may be the first option, so just hit Enter)
- Navigate back ←/↓ to highlight headware
- Material to reveal the material options that will appear under the SELECTION column.
- Navigate → to the SELECTION list
- Use the ↑/↓ and Enter to select "leather" material. You should now see leather headwear listed under SELECTION list in the center of the screen.
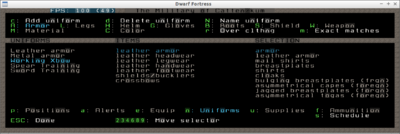
Be careful of hitting Enter at the wrong time and duplicating or deleting an entry. Here's what it should look like if you did it right:
Now press m to switch from "Partial matches" to "Exact matches" in the upper right. This appears to fix most of the issues that result in your dwarves not picking up quivers. You might be able to get away with r "Over clting", which means the dwarves will wear this uniform over their current clothing.
At this point you have created the concept of a uniform, but you have not yet told your squad to wear this uniform.
Proceed to the next section.
Positions[edit]
Now press p to go back to the positions menu. If you are creating l a new squad, it will prompt for a uniform, before showing a list of Vacant Squad positions and Candidates.
After selecting your recruits, switch to the e menu. Select your squad, then press U (that's capital U) to bring up the Uniform selection screen.
NOTE: If a position (for example, commander/captain) is highlighted when you hit the Uniform selection screen, your selection will ONLY apply to that individual soldier. Hit shift + enter to make sure you are assigning it to all positions in the squad.
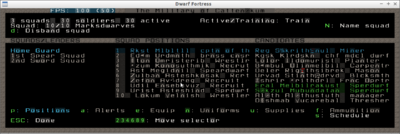
You can also look at the top of the screen to see what your dwarves will train as (i.e. 10/10 Marksdwarves, instead of 1/1 markdwarf 9/9 wrestlers).
Handling ammo[edit]
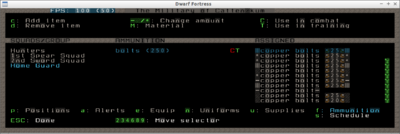
We're almost done. Go to the ammo screen.
(Note: This isn't possible in Steam version. There is no ammo screen)
If you're setting this by hand, here's what to know. Each squad needs the correct ammo. Bolts are assigned on a "per-item" basis, i.e., a given stack of bolts that's marked for training will only be used for training and vice versa. By default the top slot reserves ammunition for hunters. If you don't have any hunters you may want to remove that reservation from the ammunition screen to free up those bolts for your military.
Squad training orders[edit]
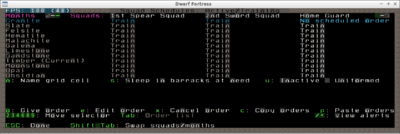
Now, for the magic bit that gets them doing nothing *but* training. Open the schedule screen with s and look at the orders. The default is "Train, 10 minimium". This is WRONG!
Press x to delete the order. The schedule screen will change to show no scheduled orders.
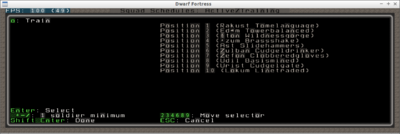
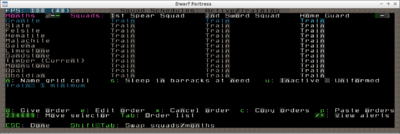
Press o to pull up the give order screen. Press o until 'Train' is set, and then press + so it shows minimum 1, like this. Then press shift-enter to give the order. The screen will look like this:
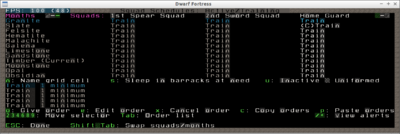
Now do it again, until you have as many orders as total members of your squad (using a macro will allow you to repeat the process easily). You can give more than 5 orders, you just have to scroll in the orders screen to see it. When you're done it should look like this, after doing it 10 times.
Copy and paste the order to all the months. You can also set Sleep in Barracks at need to increase their training time, though this will raise the stress levels of dwarves in the squad due to tired thoughts.
You're almost done. Activate your squad, and after they finish picking up equipment, watch your bolt supplies vanish as your marksdwarves do nothing *but* archery training.
Why this works[edit]
Squad training and sparring require multiple dwarves (and yes, marksdwarves *will* spar as long as they're Competent Fighters). Training, minimum of 1 forces them to work solo. Since they don't have a normal barracks, they can't drill, which leaves archery training as the only possible way to train. Since reloading on marksdwarves continues to be erratic, they'll frequently report "No Orders" or similar once they've finished archery training; until the game notices that a given dwarf is out of ammo, in which case they'll go pick up more.
Archery target training grants 5x less experience than live fire (6XP per bolt at archery target vs. 30XP per bolt on live targets), but no micromanagement, no hauling, one setup, and you can ignore it until you get that glorious announcement that Urist McMarksdwarf has become an Elite Marksdwarf.
Stopping melee charges[edit]
Do not use the station scheduling order!
When a dwarf has line of sight on an enemy, they'll do one of two things: run away; or run up and fight. While they're running up to the enemy, dwarves will shoot bolts if they have any, but then engage the enemy using their crossbows as hammers instead of shooting. Therefore, it's imperative that you create physical barriers which make it impossible for your marksdwarves to charge the enemy. Nothing else will suffice.
Some sources claim a Defend Burrows order may restrict marksdwarves to the area defined by the burrow. The full effectiveness of Defend Burrow orders at stopping a melee charge is unknown.[Verify]
The easiest way to accomplish this is to use fortification pillboxes (also known as archery towers), with a patrol order that causes them to break line of sight.
For patrol routes, marksdwarves will not reliably take a Pickup Equipment order as long as they have line of sight on their enemy; they will usually stand there and glare. Have them go through a door or something, and as soon as they lose sight of the goblin/forgotten beast/demon, they'll immediately go find bolts and reload.
An alternative approach is to forego all of this scheduling stuff, and use direct move orders. Station (move) your marksdwarves to the spot where you want them to stand, making sure that this spot is physically separated from the enemy. Remember that each dwarf will actually select a random spot within 3 tiles of your station-spot, on the same Z level, and try to walk to that spot. Make sure every such reachable spot is on your side of the fortifications.
In all cases, you must remember that dwarves can and will climb walls or fortifications to reach the enemy. To prevent marksdwarves from suicide-diving over the fortifications onto the killing ground below, build a roof (a floor on the next Z-level up) to physically block their vertical movement.
Military and defense | |
|---|---|
| F.A.Q. | |
| Guides | |
| Managing soldiers | |
| Design tips | |
| Invaders | |
