- v50 information can now be added to pages in the main namespace. v0.47 information can still be found in the DF2014 namespace. See here for more details on the new versioning policy.
- Use this page to report any issues related to the migration.
Difference between revisions of "40d:Tim's castle building tutorial"
(Added commentary on ground level image) |
m (Note regarding inner wall on ground level) |
||
| Line 63: | Line 63: | ||
* The ramp going to the top of the wall allows the removal of goblin chunks, which are occasionally flung up by the weapon traps. | * The ramp going to the top of the wall allows the removal of goblin chunks, which are occasionally flung up by the weapon traps. | ||
* On the inner side of the secondary entrance is a long windy path for invaders that might make it past the traps. This path maximises the time invaders spend walking into the fortress while under fire from the patrolling marksdwarves above. | * On the inner side of the secondary entrance is a long windy path for invaders that might make it past the traps. This path maximises the time invaders spend walking into the fortress while under fire from the patrolling marksdwarves above. | ||
| + | * The end of the winding path is blocked by a wall. This protects waiting melee dwarves from any ranged attackers that may have made it past the traps. | ||
| + | |||
| + | You can make the trapped area as long as you like, but having it turn back on itself is the most space efficient way to extend it. | ||
====Moat==== | ====Moat==== | ||
Revision as of 08:23, 29 May 2008
Seeing as there are limited tutorials on setting up solid whole castles, I thought I would create one. There is plenty of info available on individual elements, but not really on the whole setup of proper defenses from a wholistic perspective. The following is the work in progress as it currently stands. This message will be removed when it has been completed.
This is an intermediate to advanced tutorial on the building of castles, that is to say the front entrance. It is assumed that you are familiar with the game, it's interface, and how to do things such as properly build walls, designate stockpiles, dig channels etc. You should also be at least vaguely familiar with dwarven behaviour.
The art of castle building
The great dwarven general Sun Tzu said: "The art of castle building is of vital importance to your dwarves. It is a matter of life and death. Hence it is a subject of enquiry which can on no account be neglected."
When building your fortifications, you must consider not only the behaviours of goblin invaders, but also the behaviours of your own dwarves in order to keep them safe from their own simple minds. You must also consider means of keeping any and all invaders out, no matter their number or type (mandrill, goblin, troll, or bronze colossus).
On your entrance.
In order to keep your dwarves moving smoothly in and out of your fortress, you should have a wide entrance. However, in order to keep your dwarves safe from harmful visitors, your wide entrance must be able to be quickly removed.
Also, in order to ensure that any invaders will ultimately leave (allowing dwarves to safely go outside again), once your main entrance has been removed, there should be an alternative entrance ready for goblins and the like.
Such is the art of entrance design.
On your walls
Fighting from elevated terrain is advantageous, particularly for Marksdwarves. While fortifications can block shots that are fired from a distance, a good marksman can still fire through fortifications that are on the same level, or even one level above. Hence Marksdwarves should patrol an area well above the surrounding terrain.
To this effect, all areas of the outside of your fortress should be higher than their immediate surroundings so that no enemy can gain a height advantage over your dwarves
Such is the art of wall design
On your civilian population
Dwarves are not too bright. They will happlessly wander about and only react to danger at the last moment, often when it is too late. To ensure that all dwarves are kept safe, only soldiers should be allowed outside in the event of a siege. As dwarves will also go outside before they realise that where they are going is forbidden, all main entrances should be some distance outside to give them a chance to realise their folly before they run into any serious danger.
Such is the art of keeping civilians safe
Practical examples
The above principles are the basis of the following examples.
Ground Level
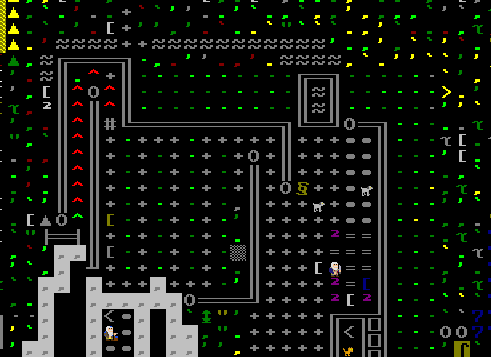
The above image shows the groud floor of the fortress's entrance.
Main Entrance
To the top right of the picture is the main bridge entrance. Important things to note include:
- The bridge is three tiles wide. This is the minimum width for a main bottleneck.
- The bridge retracts via a lever that is inside. This enables dwarves to operate the level even if they are not allowed to go outside. It also provides a wall to protect anyone on the inside from hostile ranged weapons.
- The chained dogs detect thieves and ambushers that may have made it past any detectors or traps outside
- The stockpile of stone is for building the road outside. Stockpiles are usefull during the building process if kept at the base of the stairway going up.
Secondary (Goblin) Entrance
The entrance to the left is specifically designed for invaders. Its features include
- The bridge on the left wall is so that this entrance can be retracted if so desired. The previous design included floor grates connected to a lever. These were destroyed by vandalous trolls, so the bridge, being significantly more sturdy, was used to replace them.
- There is a long windy corridor, external to the rest of the castle, which is full of traps. Weapon traps are most effective at removing goblins and trolls, but will ultimately jam under heavy use. Cage traps are essentially an instant kill for any unwelcome guest. Only one cage is used so that it can capture a large/powerful invader (one fortress of mine had a caged bronze colossus from this method), with the rest being weapon traps to kill numerous weak invaders such as goblins.
- The cage trap also means that goblin squad leaders (other than the first one) will make it some distance inside before they die and leave their squad running in disarray. Hopefully the marksdwarves on the battlements (see later in this article) will have had plenty of time to dish out the pain before that squad gets a chance to get out of range again.
- The ramp going to the top of the wall allows the removal of goblin chunks, which are occasionally flung up by the weapon traps.
- On the inner side of the secondary entrance is a long windy path for invaders that might make it past the traps. This path maximises the time invaders spend walking into the fortress while under fire from the patrolling marksdwarves above.
- The end of the winding path is blocked by a wall. This protects waiting melee dwarves from any ranged attackers that may have made it past the traps.
You can make the trapped area as long as you like, but having it turn back on itself is the most space efficient way to extend it.
Moat
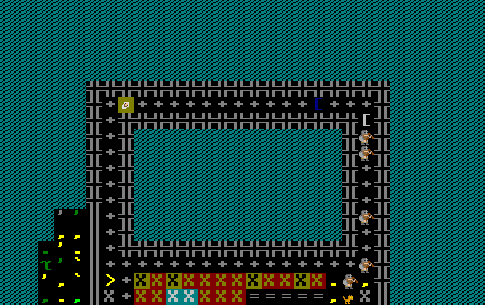
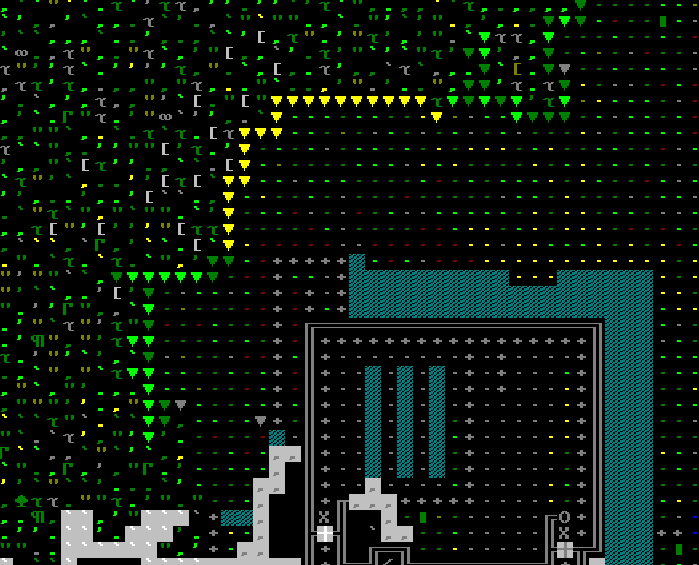
The moat around the castle keeps invaders out away from the base of the walls. If you ever get the chance to check out your fortress in adventure mode, you will notice the vision arcs that extend out around objects such as walls and trees. These vision cones also extend from one z-level to another. This means that a dwarf behind a fortification on the top of a wall will not be able to see anything at the base of the wall they are on. Their vision is blocked as far out as the wall is high, so a wall three levels high can't see anything in the first three tiles from the castle walls at ground level.
The Stairway up
At the bottom of the picture, on the left and the right, you will see two upward staircases. The most important thing to note is that these are on the inside. When construction is underway, it is often easier to leave these sections open so that the stone of choice (I like my walls made in a uniform colour) can be stockpiled at the bottom, but if this is not quickly sealed off again, it can leave your marksdwarves vulnerable to melee attack if ambushers can get close enough before the bridge is raised.
Commentary still to come
Commentary still to come


