- v50 information can now be added to pages in the main namespace. v0.47 information can still be found in the DF2014 namespace. See here for more details on the new versioning policy.
- Use this page to report any issues related to the migration.
40d:Mega construction
There comes a time in every dwarfs life when he says to himself - why not? ("Because it's insane" is not considered an automatic fail condition). Be it magma waterfalls, huge castles, skyscrapers, great cathedrals, inverted pyramids, the Statue of Dwarferty - you can build anything!
Construction Techniques
Building a large number of anything can be a real pain, to speed up the process it is recommended that you create a stockpile filled with only the correct stone/block type either inside or as close to as possible to your construction. This way the material will always be at the top of the list when you're constructing.
The important thing to remember is that all walls, floors and anything built with the b-C keys are LIFO - "Last In, First Out". That means that the very last designation you make will be the very first thing your masons will work on next! Once you master this concept, it can be used to your advantage, but only if you can plan ahead.
It is also important to remember that you cannot build constructions on top of a constructed floor, but you can attach walls to the sides of a constructed floor, and then build on them for the next level up.
Towers
Building a tower, large or small, is a Dwarf Fortress rite of passage. There are many pitfalls to construction though, mainly due to your masons' habit of building walls in their LIFO order, so adding anything puts that before everything you've already done. This step-by-step guide avoids these problems. The diagrams are for a 5x5 tower, but the instructions are adaptable to any size of tower.
Planning
If you create a stone or block stockpile nearby, then your masons can concentrate on what they're good at, and not waste time walking (possibly dangerous) distances back and forth. Alternately, dive into the ground and do some mining on the spot, creating a field of raw stone right there. (Pro tip - construct a (temporary) mason's shop or three in a stone field, and make blocks on site!)
If the tower is outside the protection of your compound, consider the safety of your workers - would digging a tunnel to the location be worth the time? Do you want your soldiers and workers to walk over the surface, or underground? No doors means building destroyers have nothing to break down.
  Key:
symbol  tile
 •  -  Empty space
 +  -  Ground, floor, or top of wall section from lower level
 0  -  Isolated wall section
╔═╗ -  Connected wall
 X  -  Up/down stairs
 ☺  -  mason
If you start with a staircase up out of the ground, you can build off of that, and your dwarves have somewhere relatively safe to run if they are ambushed, other than trying to outrun bolts and arrows. Remember that an up/down stair from below is not enough to connect two levels - you also need a down (or up/down) stair from the upper level as well.
The first rule of building upwards is to build the corners first. This keeps your mason from trapping himself in a corner high in the air, or making the corner inaccessible.
    ╔════?  <- no access
    ║   ☺║
    ║    ║
    ╚════╝
How awkward...
Base
Access to the tower is presumably from underground, but if not, leave a door so your dwarves can get in and out. Make the staircase in the corner for quickest building, or two or more adjacent if you expect lots of traffic. (Always adjacent, so dwarves can skip to one side easily.)
    ╔═══╗
    ║X++║
    ║+++║
    ║+++║
    ╚═══╝
Pro tip - if you designate walls to be built next to your planned walls, then suspend that construction, your dwarfs will not stand on those tiles to build the desired walls. This can be used to guide your masons to build from the inside, walling themselves in where it's safe, rather than the alternative.
    ╔═══╗
    ║X+☺ ◙  <- suspended wall order
    ║+++║
    ║+++║
    ╚═══╝
If we shift the view up to the next z-level up, this is what we see...
    +++++
    +•••+
    +•••+
    +•••+
    +++++
The tops of the walls act as floors. If you could get to them, your masons could walk on them - but we have no down (or up/down) stairs on this level to connect. So that's our next order of business...
Staircase
Use up/down stairs for maximum efficiency. Even if you think you're at the top, there's no reason not to build an up/down stair, just in case. Same amount of stone, same amount of time, and it leaves your options open.
    +++++
    +X..+
    +...+
    +...+
    +++++
Now your dwarves can walk anywhere on a "floor" (+) (actually, at the moment, only the top of the walls below, but we'll fix that with real floors in a moment), and connect anything on this level to that floor. (This is how you expand a tower wider than its base - by constructing walls attached to floors that have expanded out.)
Floor/roof tiles
Cover the empty space with constructed floors, which create a roof over the tiles below them. (Walls would work for this purpose too, but could not be walked on.) Altho' this may be a "roof" over the z-level below, your masons have to walk on this level to build out from the staircase, whether they're building floors (as a roof) or walls (for further vertical construction), whether you want to keep building up or not.
Be careful not to build floors on top of your existing walls, since this keeps you from building walls over them. (And, yes, the tops of walls on a lower level and floors constructed on the current level look identical in the game. Use k if you need to double check which is which.)
    +++++
    +X+++
    +++++
    +++++
    +++++
(For a 3x3 tower, you don't need any floors at all, the walls are tight around the staircase.)
     +++
     +X+
     +++
Upper-level corners
From here out, your masons can't stand outside the construction to do any work - it all has to be done from the inside. Construct the corner walls once the first ring of floor tiles are finished. You can start them sooner, but there's a chance the far corner could become inaccessible, which suspends construction. (If you understand the LIFO concept, you can plan it so this doesn't happen, by designating the sides first and the corners last - your call.)
    0+++0
    +X+++
    +++++
    +++++
    0+++0
You can start the center walls before the corners are finished, but always leave one floor area adjacent to the corners for last to access those corners. Much smarter, build either the N-S or E-W walls, including corners and then the rest. Much less designating to do too.
    ╔═══+
    ║X+++
    ║+++║
    ║+++║
    ++══╝
And finish the walls on this level. From here you can go up and repeat the pattern again as high as you want.
    ╔═══╗        ╔═══╗
    ║X+++        ║X++║
    ║+++║   ->   ║+++║
    ║+++║        ║+++║
    ╚+══╝        ╚═══╝
Corners Last?
If you don't mind your tower not being square, you can seal the corners from the inside. This takes up some space inside the tower. The corners have to be built from the inside. Even on ground level, your masons will always end up on the inside. (The stairs must be shifted from the corner for this design.)
    +═══+     +╔═╗+
    ║+X+║     ╔╝X╚╗
    ║+++║ ->  ║+++║
    ║+++║     ╚╗+╔╝
    +═══+     +╚═╝+
Adding fortifications
If you want an open floor, where marksdwarfs or siege engines can fire out, you want some fortifications instead of walls. Along the edges this is easy, but fortifications cannot be walked on, and a mason can't build them from a diagonal tile, so we're back to "build the corners first!"
    ╬╬╬╬╬
    ╬X++╬
    ╬+++╬
    ╬++++ <- this fortification last!
    ╬╬╬╬+
Don't worry about there being no walls - the entire next floor and everything above can be connected to one tile of staircase, no problem.
On our 3x3 tower, fortifications would have to hang over the edge - which is fine structurally, so long as they're connected to something before we're done. But our masons can't walk on fortifications, so those corners present an access problem...
             •╬╬╬•
    +++      ╬+++╬
    +X+  ->  ╬+X+╬
    +++      ╬+++•
             •╬╬•?  <- no access to corners
The solution is to build a temporary floor off the tower side, to give your masons access to those corner fortifications. Once built, then connect those to other fortifications (they have to be connected!), then you can safely deconstruct the floors and replace them with the final fortifications.
             +         ╬+ ╬╬       ╬  ╬╬      ╬╬╬╬╬
    +++      ++++      ╬++++       ╬+++       ╬+++╬
    +X+  ->  +X+   ->   +X+   ->    +X+   ->  ╬+X+╬
    +++     +++++      +++++        +++       ╬+++╬
            ╬   ╬      ╬╬ ╬╬       ╬╬ ╬╬      ╬╬╬╬╬
The stones that the temporary floors had been built with will fall to the tile below them - this is not a "collapse".
Scaffolding
Building rows and rows of up/down stairs will allow you to build large walls without having to worry about getting the workers and materials up there.
Be careful when you're dismantling them that each row is removed one at a time, starting from the top!
You may also consider building the scaffolding inside the building you are constructing, ensuring that the entire ground floor wall is constructed. Then you wont create any surprise back doors into your fortress.
Sloped Roofs
Sloped roofs can be created by building a row of walls adjacent to the top of a wall, a row of ramps can then be built directly on top of the wall giving access to the top of the adjacent wall. Now just build a second wall adjacent to this one and repeat.
Examples
Hippie Exterminator
You gotta water those trees man, and let the treehuggers that care so much for them take share in this watery gift!
Basically, construct a megalong wall all the way around an elf-village, then use flooring to put a lid on the entire village. Hook up some pumps from the local river to fill this box with water. This will kill all of the elves enclosed inside, and your fps in the process. Totally pointless and timeconsuming, thus making it a worthy megaconstruction. Example fortress: Fleshgates of Drowning
Dwarven Arcology
This is ideal for your patently insane Stupid dwarf trick needs. Essentially it's building your entire fortress above ground in ONE structure. A subterranean level (the basement) on the bottom floor provides plump helmets, pig tails, and so on. On the ground floor, grow above-ground plants and carve fortifications into all the walls. From here, it's all about absolutely huge levels packed with food stores, refuge dumps, wood stockpiles, workshops, archery ranges, and bedrooms. The only subterranean activity permitted is digging, although you may be able to get away with building your depot below ground. This consumes ridiculous amounts of time and stone, placing walls is extremely fiddly, and as soon as goblins control the ground floor your fortress will starve unless you can exterminate them. So, pointless, frustrating, and borderline suicidal...in short, a perfect megaconstruction.
Viewing
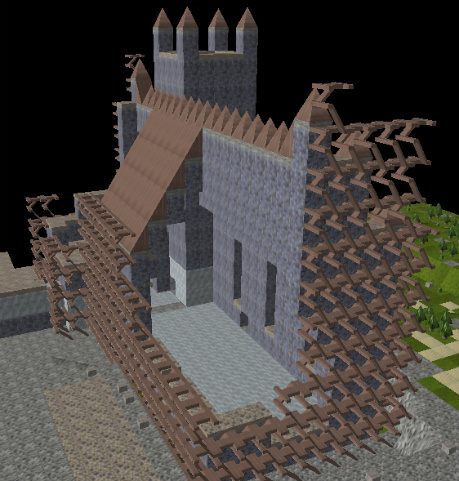
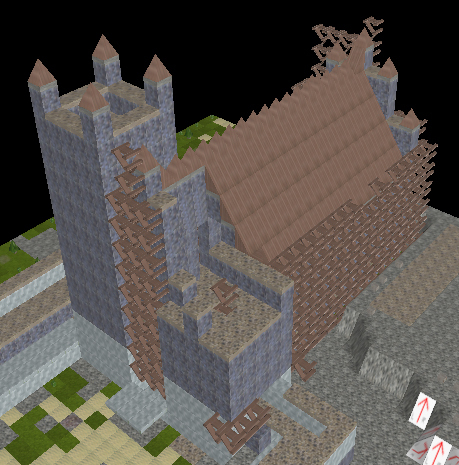
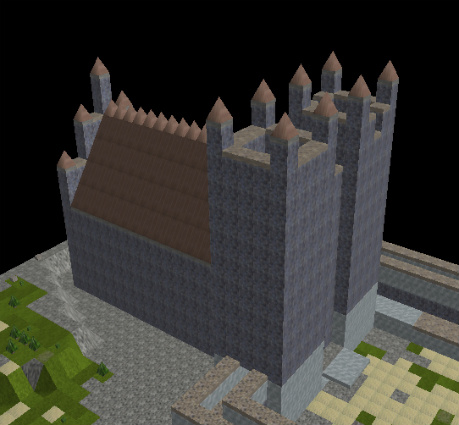
Most mega structures look best when using a 3D tool, there are however some restrictions involved.
3Dwarf
All walls regardless of material will show up the same, the only difference is fortifications which will show up a lighter shade of blue.
All ramps and stairs regardless of materials will show up as wood.
Single ramps will show up as square pyramids but only if there are no adjacent walls that are one z-level higher than them.
A row of single ramps will not join together as a 'toblerone' shape, instead they will show up as a row of square pyramids.


