- v50 information can now be added to pages in the main namespace. v0.47 information can still be found in the DF2014 namespace. See here for more details on the new versioning policy.
- Use this page to report any issues related to the migration.
v0.31:Legends
| This article is about an older version of DF. |
Legends mode is one of the three main methods of interacting with an already generated Template:L. You cannot start Legends mode (or Template:L or Template:L mode) until you create a new world.
Legends mode allows you to inspect the history of a world. Many players choose to design a world where the option Reveal all history is set to YES. However, if you set the option to NO, then the the vast majority of the world's history will be hidden from Legends mode, and only uncovered by brave adventurers. In fact, there are many ways for an adventurer to uncover the past. Talk to people in civilized sites and they will tell you of their families, surroundings and local histories. Past events can also be found by viewing Template:L or items with images, or by visiting an abandoned Template:Les and viewing the Template:L tiles within.
You don't have to have an adventure or fortress game active in order to use legend mode. Some players simply enjoy Legends mode for the option of looking at the interactive historical map, or to read about the last time their favorite kingdom went to war, or for the ability to export lists of all the sites and governments active in the world.
Number of Events Undiscovered
A self-explanatory number indicating how many "legends" are still lost in the mists of time. If you chose to reveal all history during world generation, the number displayed should be 0. Otherwise, better get out there and adventure some more.
Historical Figures
The number to the right indicates how many historical figures exist in this world's history. Historical figures include entries on Template:Ls, Template:Ls, Template:Ls, gods, Template:L, Template:Ls, Template:Ls, Template:Ls, and named Template:Ls.
Sites
The number to the right indicates how many sites have existed throughout this world's history. Sites include things like towns, towers, fortresses, forest retreats, and Template:Ls.
Regions
A list of the various regions of the world, along with the various historical events that occurred within those regions.
Civilizations and Entities
The number to the right indicates how many civilizations, local governments, and religions have existed throughout this world's history. The histories of these various groups can be viewed as well, detailing events like when a site was founded, when a person was kidnapped, or when a road was completed.
Structures
Structures are buildings found throughout the world. Fortress, towers, shops, taverns and more can all be found in this list.
Historical Map
The historical map is a relatively new and very cool feature of Legends mode. From here you can view the territorial disputes between different civilizations and entities, including those who were destroyed before your starting year. If you are new to Dwarf Fortress, reading the map may be a little difficult, but play around with these buttons and you might get a better grasp of what you are seeing. Press Enter while looking at the map to change between the political and geographical view of the world. The geographic map is colored (blue seas, gray mountains, green forests etc.) while the political map's background is tan (think parchment) with colored fields corresponding to the territories of different civilizations. Civilizations can lay claim to the same area, causing the colored territory markers to overlap. You can also see how territories changes over time by moving 10 or 100 years forward and back through time. Pressing c while looking at the political map will show local government territories instead of civilizations, but that's generally a pretty messy scene.
The Age of...
During world generation, the Ages are named for the greatest powers extant in the world. In v0.31, megabeasts are nearly immortal during world gen, so history rarely ever advances beyond the "Age of Myth", although with a small enough world, or a modded game you can get names like "The Age of the Titan and Hydra". In previous versions, Ages would commonly advance during world generation (e.g. Age of Legends, Age of Heroes, Age of Humans), this is now extremly rare. When you choose to look at the history of an Age, you will be given a list of all historical events in chronological order. Here you can read the battle reports from various wars, or the duels that took place between long dead champions, or the burninations rampages of megabeasts amongst the peasants. For a list of ages and their conditions, see this page.
XML dump
Once you've generated a world, you can dump much of the historical data into an XML file for external analysis. The XML dump currently doesn't include every detail of world history but it contains many of the important ones. Be warned that a large world with a thousand years of history can produce an XML dump up to a full gigabyte in size, which may prove unwieldy. Press x while in Legends mode to produce an XML dump (it will be placed in the root Dwarf Fortress directory and named the same as your game's save folder) See XML dump for information on the XML file's format.
Export Map/Gen Information.
Another option is to export the map/gen information by pressing p in Legends mode. This produces three .txt files that are placed in the root directory of Dwarf Fortress, named after the save file you're viewing:
- (save name)-world_gen_param.txt - contains the world generation settings.
- Template:L - Includes some information about the deities, and rulers of the Human, Dwarven, Elven, and Goblin civilizations.
- Template:L - Lists the sites' population, owner, parent civilization and warlord. This one will also list all the animal populations above and below ground including demons.
Export Detailed Map
Pressing d in Legends mode reveals a list of the different kinds map you can export. The Images are exported to the root directory when you highlight the one you want and pressing Enter.
- Standard biome+site map
- Template:L incl. lake and ocean floors
- Template:L respecting water level
- Template:L
- Template:L
- Template:L
- Template:L
- Template:L
- Template:L
- Template:L
- Template:L
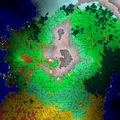
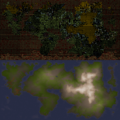
The last image is produced using the following steps.
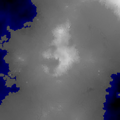
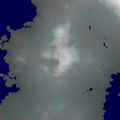
1. You need to export Elevations Including Lake and Ocean Floors (this is your height-map), Elevation Respecting Water Level (this is for figuring out ocean boundaries) and Current Vegetation.
2. Open your elevations map in photoshop or paintshop or whatever you use. That's your base layer. Colorize it brownish.
3. Open your water levels elevation map and select the blue, invert and delete everything that isn't water. Place this "water" on a new layer above your brown elevation map. Play with the transparency until you have an effect of shallow coasts and deep oceans, 70-80% looks good. Adjust the color if you think the blue is too dark.
4. Open your vegetation map and paste as a new layer above the water. Colorize it greenish, set the blend mode to "color" - this blends the color/saturation but doesn't mess with the lightness so you can see the elevation under your "foliage". Blend mode "Hue" has a similar effect, use whichever you prefer. Adjust transparency of this layer (~60%) or you won't have any brown show through.
5. Import the rainfall like above and add as a new layer above the rest. Blend mode Lighten so only the light areas show. You'll see there's only a few gaps you can see through because this is literally all the rain in the world- you only want the heavy parts as "clouds". If you adjust the brightness you'll create more gaps but your clouds will become darker. Use the curves tool instead- see pic for a nice setting. Then use a weal blur or average effect to take the hard edges off the new clouds.
