- v50 information can now be added to pages in the main namespace. v0.47 information can still be found in the DF2014 namespace. See here for more details on the new versioning policy.
- Use this page to report any issues related to the migration.
Design strategies
v53.12 · v0.47.05 This article is about the current version of DF.Note that some content may still need to be updated. |
There are at least three basic factors to consider when designing your fort.
- Security: Every fort needs some basic security measures, otherwise you won't survive the first serious kobold attack, much less a full-blown goblin siege.
- Efficiency: Whether hauling rocks, making a booze run, or just checking the contents of a cabinet, dwarves do a lot of walking. A good fortress layout -- especially the proper placement of workshops and stockpiles -- can significantly reduce the time your dwarves spend walking.
- Aesthetics: Hey, everybody wants a fortress that looks good.
In addition to the considerations above, it's also important to remember that long-term design strategies can easily be disrupted by the discovery of underground terrain features. Don't plan too far ahead, as you might need to adapt to unforeseen obstacles.
Also, there are several design idioms of common usage like pump stacks and water reactors.
Security[edit]
Everyone will have their own preferences regarding fortress defense and how to deal with undead, wildlife, hostiles and goblin invaders. Regardless of specifics, it's important to have a plan for dealing with the several different types of inevitable attacks. A few security tips are given below.
The single most important thing to remember is that in an emergency, your dwarves will be too panicked to react to orders. Prepare for every type of threat (both military and engineering, in the form of floods or other Fun) before it finds you, or it will be too late.
Walls[edit]
Walls are a very powerful tool to protect your fortress against all but the most determined attackers. Putting a wall between your vulnerable and valuable civilians (and the others, too, why not?) and the things trying to kill them is one of the highest priorities you have. Following recent advances in Goblin siege technology there are reports of attackers building ramps to overcome walls and even destroying the walls themselves.
Building walls can take time and micromanagement, but building a maze (and stuffing it with traps) is a good way to slow invaders down, especially if you get forewarning from scouts. The longer invaders take to reach you, the more time you have to get your militia in place. However, since the advent of climbing, keep in mind that just having 1-z-level walls are not enough. Place fortifications at the tops to stop climbers.
Digging ditches/moats, then removing the ramps can also be useful as a faster method of creating impassable terrain for non-fliers, which have the added advantage of allowing marksdwarves to shoot over them. Easier still is just using the "natural walls" of a hill, and removing all the ramps on one side or the other of the hill while building walls between the gaps. Climbing, however, makes this not enough for all circumstances. Either carve or build unclimbable fortifications, or else dig another z-level down, and then dig two tiles under the rim of your platform to create an overhang that is impossible to climb.
Excavating fortresses by digging them out naturally creates walls, and makes for easy defenses, since it is far easier to designate for digging than to build a wall. Enclosed caves are also proof against flying monsters. At first, you might simply dig into a wall and put up a door, but consider making a large, extended underground tunnel, or preferably several tunnels, all of which can be locked down, and then walling over your initial entrance so that you can force enemies to approach your fort on your terms, and at a time and place of your choosing. If defenses in one tunnel don't work, lock it down, and leave a different one open, so that they have to run back through your killzone to try approaching a different one.
Lockdown[edit]
Have a way to lock down your fortress. In the event of an attack by hostiles you can't handle, you need a way to lock them out. This can buy you some time while your dwarves prepare their defenses.
For small forts, this could be as simple as placing doors at all the entrances to your fort. Doors can be locked instantly in an emergency. Don't rely on doors alone for security, though, as you'll eventually encounter enemies that can break down doors and pick locks.
Doors are important even within your fortress. Tantruming dwarves are the bane of every established fort. Having a way to segregate your dwarves so that they don't run into a dwarf on a rampage can save whole forts, much less individual lives. Doors can also stop flooding, and act as bulkheads that isolate breaches if you accidentally flood your fort. Having secondary hallways to route around problem areas is also a sound strategy for making doubly sure your fortress can survive a breach of defenses. If everything in your fort must travel through a single hallway or central staircase, anything that reaches that point can almost be guaranteed to kill your fort.
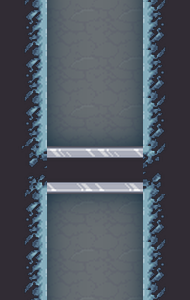
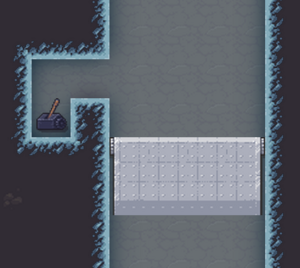
For more security, place drawbridges at all the entrances. You don't need a moat; the bridge itself is sufficient since it functions as a wall when raised. Just be sure to connect it to a lever that your dwarves can access quickly and safely in an emergency. Unfortunately, even drawbridges can be rendered inoperable in rare circumstances....
To have a dwarf ready to pull a lever in case of an ambush it's best to place them near the meeting hall. You can also make dedicated leverdwarves by turning off all their labors and assigning the levers to them. Vampires and necromancers are very good for this job, as they do not require sleep, however their mood may be a problem because they will not drink anything. To avoid this, make sure you have a tavern keeper to give them alcohol.
Finally, don't forget about attackers from above and below! Flying attackers might use skylights to bypass your doors and drawbridges. Farms, even "aboveground" farms, can be placed underground with exploits, but some of the best trees grow aboveground. Use drawbridges on even the walled-in exits to the surface in case of giant keas or rocs.
Swimming beasts might crawl up through your well. It is best to use water from sources that are completely walled off from the outside world, like a reservoir fed by an aquifer. You can also use a screw pump pulling through a floor grate to prevent hostiles (and building destroyers) from swimming into your fortress. (The same holds doubly true for magma cisterns.)
Creating multiple entrances that can be locked down can force an invasion to stop in its tracks, reverse course, and march all the way around the map to get access to your fort. Repeatedly yanking the drawbridge up, forcing them to go back to a different entrance, and letting that drawbridge back down while pulling up the one the assault was going for then can keep an invasion in limbo for a very long time, giving sleeping or drinking milita dwarves a chance to get their act together, or to let a repeater spike trap murder everything on the 12th pass.
Scouts[edit]
Ambushes and thieves can sneak up on your fortress. A party of goblin archers might sneak past your main gate before being spotted, or a kobold could make off with your masterpiece crafts when nobody is looking. The way to avoid these unfortunate events is to use scouts / lookouts.
For small forts, effective scouting could be as simple as tying a war dog (or even a donkey) up near the entrance of your fort. In the event of an ambush the animal will spot the attackers (shortly before dying). If your scouts are far enough from your main gate then you ought to have enough warning to lock down the fort, activate the militia, etc.
For more established forts, placing any sort of non-eating domestic animal in a 1-tile pasture on top of a grate that allows it to look downwards, or behind windows from a single z-level above the hallways protects your stalwart watch-geese so that you don't have to keep sending out more replacement dogs. Save the good war animals for a "Doberman Bomb" (cage linked to a release lever) that unleashes dozens of animals on invaders at once, rather than letting the invaders murder your dogs one at a time.
Caravan security[edit]
Is your trade depot going to be inside or outside your main line of defenses? This is another factor to consider when designing your fort. Although you don't have to protect the traders, their civilizations might hold your fortress responsible for any casualties.
Consider that merchants may go insane if kept in place, or if they get affected with a syndrome, so it is possibly best to have a means of segregating the rest of your fort from the trade depot, like a drawbridge-wall. At the same time, you need to load goods into and out of the depot quickly, so it should be near major stockpiles and where your haulers usually spend their time.
A caravan needs a 3-tile-wide entrance (preferably a road where you aren't placing traps to prevent a tree from growing in the path) so they tend to complicate defenses. Consider using a retractable drawbridge to allow/disallow certain entrance and exit routes from your fort. An "elevated highway" exit from your fortress that is only accessible after throwing a switch leaves an exit that allows merchants to leave in safety if a siege happens while they are trading, but entrance paths need to be kept clear, regardless. Sieges and ambushes only start from map edges that can path to your dining hall, while a caravan starts from areas that path to a valid trade depot. If you use drawbridges to cut off access to your fort from the trade depot until after the caravan passes (and you raise) a drawbridge that cuts off outsider access to the trade depot, and you then let down a drawbridge to an elevated walkway that normally grants access to nothing, you can generally ensure no ambush will follow your trading partners in. (Although the degree of engineering may force you to wait several years...)
Traps[edit]
Traps are a great way to protect your fort from small groups of attackers. When designing your fort, think about where you want to place traps. Choke points at major entrances (including entrances to the caverns) make good trap locations. However, be warned that some enemies are immune to traps....
Spikes/spear traps set to levers you order dwarves to repeatedly pull or attach to a repeater are capable of hurting creatures that can avoid traps, but require great stretches of killzone to operate effectively.
Deliberately-induced cave-ins, such as by linking a pillar to a lever, and dropping an otherwise unsupported wall, creates deadly dust that can knock even trap-immune creatures unconscious, which renders them vulnerable to ordinary traps. Cage a titanic beast, and put it in your zoo for the kids to marvel at!
Advanced dwarven techniques include methods of flooding and draining killzones with dangerous fluids like water or magma, or both to obsidian-cast the problem, which is guaranteed to kill any physical threat in existence. Other methods include controlled fires (often caused by controlled magma release). These, however, are potentially very Fun tools, so be sure you understand what you are dealing with before you set yourself to it. (Or just make it a learning experience when you mess up an early fort. Hey, Fun IS fun, after all!)
Staging area[edit]
Many players like to design their forts with a militia staging area at the main entrance. Usually this includes placing fortifications (possibly in archer towers), ammunition stockpiles, and cover for your melee dwarves to protect them from approaching archers.
If you want to rely on marksdwarves, consider fortress entrance designs that favor their method of attack. Make the only entrance a snaking series of bridges that force invaders to zig-zag in front of your marksdwarves. If that doesn't provide enough time to kill them all, stack several floors of snaking bridges, and let your marksdwarves simply climb a couple stairs to get to the next killzone between rounds. If you rely heavily on marksdwarves, remember that sieges can also contain elite archers that fire through fortifications. Prepare a 1-tile-wide drawbridge "shutter" that can block sight in front of the fortifications to protect vulnerable marksdwarves or allow for recovery of the wounded if you want to try out-shooting an elite archer.
Some players also like to place a training barracks near the entrance to the fort so that the militia can quickly respond to attackers. Putting it outside is even better as it also prevents cave adaption on your soldiers which can give you an edge in a siege, as more serious cases of cave adaptation severely cut the speed of the affected dwarf. If you don't let your military dwarves outside that often, let them fight in the shade; Make your staging area underground, and just wait for the siege to roll into your staging area, instead.
Staging areas can also come with some extra help - a cage filled with every random potentially dangerous creature you don't need pastured can, when released, provide a massive (and potentially hilarious) distraction. Even a barrage of 40 kittens can bog down invaders enough that a lone swordsdwarf can fight enemies one-by-one.
Efficiency[edit]
Although many actions in the game take time, and skill levels significantly reduce the time the actual crafting of items or resource gathering takes, by and large, the OVERWHELMING majority of wasted productivity comes from dwarves having to march great distances to reach a raw material for their crafting needs. Even worse, if they get thirsty while hunting down that stray boulder at the bottom floor of the mines, they'll go all the way back up for their drink, and have to take the trek back down again, later. As such, efficiency is all about shortening the trips your craftsdwarves must take as much as possible.
Proper placement of stockpiles is key. Almost every workshop job needs raw materials. Is your still near some empty barrels and plants? Does your mason have easy access to stone? A smelter must have quick access to both ore and fuel.
As a general rule of thumb, each workshop should have at least a 3x3 stockpile area associated with it. Some workshops will need more if multiple raw ingredients are needed. Workshop design is a science in of itself but one efficient arrangement is to place output stockpiles directly above or below your workshops and connect them with stairs. Another common design is to carve out a 5x5 room and place the 3x3 workshop in the center, leaving 16 surrounding tiles for input storage.
When utilizing a large storage stockpile, for food or wood for example, the optimal approach is to place a small stockpile next to the workshop and have the small stockpile take from the large stockpile.
There are a few other things to consider for basic fortress efficiency:
- Major hallways should be at least two tiles wide, preferably three tiles. Otherwise your dwarves will be constantly running into each other causing productivity and possible framerate to be slowed.
- To reduce the amount of time that your dwarves spend walking, common areas should be placed near the center of your fort. Dwarves drink frequently. It's a good idea to store your booze in a centralized location, and to designate a meeting hall in a similarly centralized place.
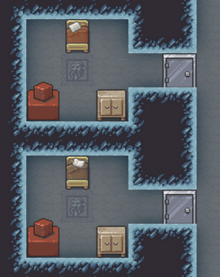
- An efficient fortress must make good use of all three dimensions. A dwarf climbs or descends one z-level in the same time it takes to move one step horizontally. For example, when you need to build more bedrooms it can be a lot more efficient to dig down one level than to place the new rooms 20 tiles farther from the center of your fortress.
- Moving one step diagonally takes about 1.4 times as long as moving one step orthogonally. This matches the real world, where Pythagoras tells us that it should take √2 (about 1.414) times as long. You can optimize floor plans for pathfinding by adopting more circular shapes into your design.
- Similarly, since vertical Z-movement is cheap, the more spherical your fortress is in shape, the less walking there is, overall. Placing workshops side-by-side on a single floor means each additional workshop requires a dwarf move at least 3 more tiles (and if there is a wall or space, 4 or 5 tiles) to reach their destination, and they will be frequently running back and forth between stockpile and workshop. Vertical stacking means a dwarf only moves 1 tile.
- With burrows, it is possible to keep some dwarves working in a specific area, so that they never try to take a task half-way across the map, or haul items a long distance through high-volume corridors. For example, you might keep your furnace operators and your weaponsmiths hard at work in their smelters and forges by designating a burrow for them. Make sure you understand burrows before attempting this - if there is no source of food or drink in the burrows a dwarf is restricted to, you may run into some problems. (This means possibly making additional dining rooms just for these dwarves.) Also make sure the dwarves' quarters (or at least a dormitory) are inside the burrow.
- A more advanced technique is to segregate your fortress by raw material, and have separate "wings" or "nodes" of the fortress for different types of material. All woodworking workshops, for example, are connected to a vertical shaft dug down from a stockpile near the front gate that takes in lumber from outside, where craftsdwarves only need to travel 3 tiles horizontally to the stairs, 1-4 z-levels up the stairs, and a tile to the side to reach their lumber supply. Since most industry takes only one general type of raw material (wood, stone, metal/ore, gem, food, cloth,) you can easily segregate by raw material. Put "finished product" stockpiles on a separate floor, as well.
- Place your residential sectors (housing, food, and drink) as close to the workplace as possible. Dwarves waste most of their non-working time just walking to the drink supply. Make that as short as possible. Don't be afraid to make secondary alcohol stockpiles, and you can actually put residences for craftsdwarves right under the stack of workshops. Legendary dining halls are tougher to make in droves, but not so tough you can't do it with an established fort.
- Blocks can substitute for raw rock for construction purposes, but are much lighter. If you are digging in a depth of 100z and need many rocks for building structures at the surface, you should set up a rock storage and a mason´s workshop at 100z to permanently make blocks, and use the blocks for the construction. This is a full-time job for one mason, but the speed of the construction dwarves is increased a lot.
Aesthetics[edit]
Aesthetics are completely subjective, of course, but it's still something you may want to consider when designing your fort.
- Symmetry is often the easiest path to visual appeal, but it may be hard to balance with function. Asymmetry can look great but requires more skill to look graceful.
- Conform to either mostly organic shapes or mostly inorganic shapes. A mixture probably won't look very good.
- Try digging passages out of stone rather than soil. Although digging in stone is slower and messier, stone can eventually be smoothed and engraved, and yields a usable material. Soil, on the other hand, is ugly and much less dwarfy (although being excessive and paving stone over everything is arguably more dwarfy).
- Use stockpile settings to consistently build your furniture and blocks from a single type of material. Bedrooms tend to look nicer when the furniture is uniform.
- Alternatively, if you like lots of color and variety, you can use the stockpile and workshop settings to make sure your dwarves use lots of different materials.
- Ramps are generally more aesthetically pleasing than the extremely narrow switchback stairs, but carry a much larger cost in efficiency and ease of construction.
Further Reading[edit]
For an in-depth examination of topics relating to fortress layout, these pages focus on specific aspects, mostly with an eye to improving survivability. Some of these are not directly related to architecture but are useful nonetheless.


