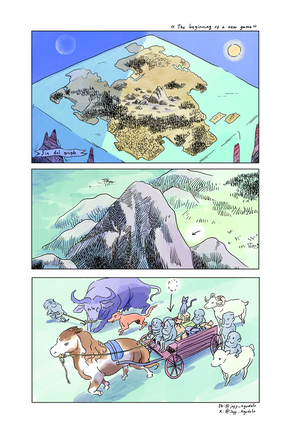
- v50 information can now be added to pages in the main namespace. v0.47 information can still be found in the DF2014 namespace. See here for more details on the new versioning policy.
- Use this page to report any issues related to the migration.
Embark
v53.10 · v0.47.05 This article is about the current version of DF.Note that some content may still need to be updated. |
Embark is the time at the very beginning of Fortress mode before actual gameplay begins (but after generating a world), when you and your initial 7 dwarves:
- Choose a site.
- Assign starting skills to each dwarf.
- Select an initial load of supplies and equipment.
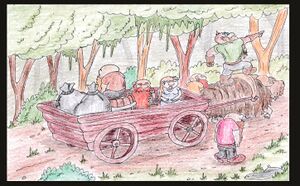
- Arrive at the site with your wagonful of supplies.
Choosing a Site[edit]
The main considerations to keep in mind when choosing a site are: the presence of aquifers, availability of wood, ores, and soil, the climate, and your neighbors. There is just ONE BIG RULE: when your home civilization is too small or inaccessible, after the second winter you won't get any more immigrants, which can be extremely fun. To avoid this situation, select a home civilization with at least two dwarven sites on the map on the same land mass as your embark location.
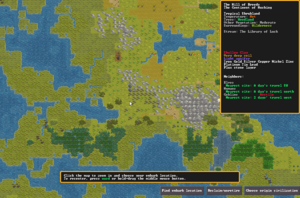
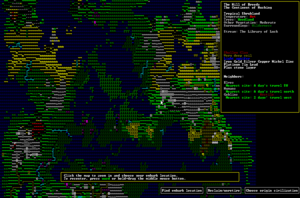
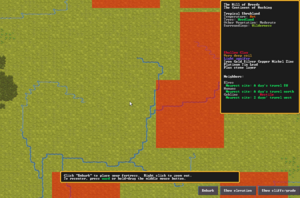
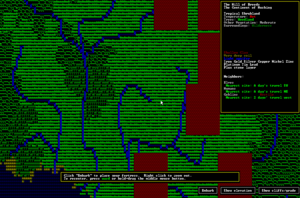
The Choose Fortress Location screen has two different zoom levels: Region and Local. In the region view, you can search for an embark location, reclaim or unretire a site, and choose your origin civilization. Each tile on the region view encompasses a 16×16 grid of local view tiles. In the local view, you can select your embark location and view the elevation and grade of the terrain. Additionally, you will see the location of other sites in red, or white (magenta in ASCII mode) for the currently selected dwarven civilization if that menu is open.
Once you select embark, the embark area is shown at the mouse cursor. It can be resized by clicking the arrows in the top-left corner. The size of the embark location directly affects how much data about a map the game will have to store in your computer's memory and the size of your save files. This may slow your game down, and have an effect on the save and load times for your map. As such, smaller maps are recommended, especially for less powerful computers, though 1×1 is not since it is too restricting. Each embark tile on the local view is 48×48 tiles large once you embark.
Before you confirm your embark, you will be presented with any notable dangers present in that location. Once you confirm, you'll set up your settlers and equipment.
Your Civilization[edit]
Selecting Choose origin civilization will show all dwarven civilizations in the world. When you select a civilization in the region view, it shows the civilization's population, the number of sites, your monarch and scrolls the map to highlight which sites belong to that civilization. Zooming to the local view will show you exactly which tiles are claimed by that civilization. Civilization choice will affect who is at war with you and what goods are available for trade and at embark. If your civilization is dying or dead (low population, low number of sites), you will receive few immigration waves and may eventually stop getting trade caravans. If this is the case, it is recommended you change to a still-existent civilization, unless you want the challenge of having no support from the Mountainhome.
Biomes[edit]
A biome is a biotic area with homogeneous features, characterized by distinctive plants, animal species and climate.
In the example map, the biome is a "Tropical Shrubland". The region that contains the biome is named "The Hill of Breeds", and it is part of the continent "The Continent of Hushing".
Biomes will also contain only one set of stone layers, though these usually expand beyond a single biome. Your dwarves will find different resources depending on which biomes they select when starting a fort.
It's important to check the different tiles when choosing a fortress location, in order to understand your surroundings. Each tile on the local view may have its own biome, which you can check by hovering the mouse over each tile.
Climate[edit]
Climate determines the temperature range of the region, which in turn impacts the severity of exposure to the outside, whether water will freeze in winter, and how quickly water evaporates.
The climate is displayed as "Temperature: Hot" in the example map.
Very hot and very cold biomes bring their own challenges, which may be further compounded with overlapping features, such as a glacier being frozen for half the year, being devoid of trees, and lacking a river. Very hot climates may see all their surface water quickly evaporate, making finding a water supply more dangerous, as underground caves filled with hostile creatures may be the only supply of water.
Plant Life[edit]
Seen in the example map as "Trees: Woodland" and "Other Vegetation: Moderate".
Trees are useful for the wood they provide, and wood is a basic building material, important for being the only material that can be used to create beds. Also, because creating bins and barrels from metal is an involved process involving more steps, less common resources, and fuel, wood is often preferred for making these items as well. Wood is also a source of charcoal, one possible fuel used to make metal products in standard smelters and forges and required for making steel even when you have magma forges. Wood is also useful in making lye for soap or potash for fertilizing farms.
Despite wood's many uses, it is entirely possible to play without any trees in your biomes. Due to the inexpensive nature of wood, it is possible to simply embark with a large quantity and rely on trade caravans from the elves, humans, and dwarves for your wood needs. Also, at a certain point, trees can be farmed in muddied underground areas regardless of how barren the surface is.
Shrubs can provide some quick food through the herbalist skill, brewable materials, and seeds for some very helpful above-ground crops which are generally only available through trading with Elves.
Surroundings[edit]
Surroundings affect how powerful and hostile local wildlife will be, and some forms of plants are available only in specific types of surroundings.
The surroundings of the example map are listed as "Surroundings: Wilderness".
There are two components for surroundings: savagery and spirit. Savagery is notated as Benign, Neutral, or Savage. Spirit is notated as Good, Normal, and Evil. These components overlap to form the nine different surroundings. Any biome can have any set of surroundings; for example a glacier could be haunted, wilderness or mirthful. However, a named region (which is a contiguous area of one category of biomes, such as forests or wetlands) will be either good, normal, or evil.
Benign and neutral savagery are functionally identical. Savage lands are like neutral lands, except they will frequently have giant or humanoid versions of normal animals. In a savage jungle, for example, you might have a tiger man instead of a mere tiger.
Surroundings with good spirit are generally no more dangerous than their normal spirit counterparts, and have more fanciful (and generally benign) creatures like pixies, fluffy wamblers, or unicorns. Evil spirit, however, is far more dangerous to settle. The surface is often scarred with dead vegetation, and rain can inflict disease on your dwarves. It also hosts dangerous creatures, including undead animals, and many evil surroundings will reanimate anything that dies in it. These factors make for a much more hostile environment, specifically for players who want to face a greater challenge.
It is possible to start a fortress that overlaps multiple alignment types (for example good, evil, savage, and benign). Some players consider this desirable, as it provides diversity in your little corner of the world, but it also has its dangers in the form of more ferocious wildlife.
Layers[edit]
At the bottom of the information box, some of the main features of the site are reported. You will be told if the biome has soil, whether that soil includes clay, sand, or both, and the depth of the soil layers. Deep soil layers make underground farming extremely quick to set up, as no irrigation will be needed. However, unfertilized topsoil farms are not as productive as farms made on muddy stone. Additionally, any metal ores available underground are directly named. Flux stone layers are also reported if present; you can now guarantee yourself the raw materials for a steel industry if you embark on an area with both flux and iron.
Aquifer[edit]
An aquifer is a layer of soil or stone saturated with water, and an area may contain up to 3 aquifer layers (theoretically more are possible, but extremely rare). These aquifers come in light and heavy varieties, both behaving slightly differently. Both can raise the difficulty of starting a fort, but heavy aquifers are much harder to deal with. For specific tactics on managing aquifers, see Aquifer.
Neighbors[edit]
Neighbors lists other civilizations that are close to your current location. Proximity increases the chance of interaction, but any civilization listed is close enough to interact with you. If any race is not represented on this page, it means that race cannot reach you. Embarking on an island, or a location completely surrounded by mountains will make it impossible for any civilization but your own dwarven civilization to reach you, as world map travel across oceans or mountains is impossible. Races that are hostile to you are noted as either "Hostile" or "War". The latter means you will get sieged by that race, but "hostile" stands only for diplomatic hostility (usually from baby snatching in worldgen). They'll still siege (eventually), and the first time they do will constitute a declaration of war[Verify]. In vanilla DF, goblins are always hostile, but humans or elves may also be at war with particular dwarven civilizations.
It is important to note that necromancer towers are not listed as neighbors. The undead sieges sent by a tower are many times more dangerous than those sent by other civilizations, so be careful. The embark confirmation will warn you if you are too close to a tower.
Creating Your Settlers[edit]
After confirming the embark site, you then choose how the starting dwarves' skills, equipment, and animals are determined, as well as some difficulty options. This is where previously saved or downloaded embark profiles can be used.
Difficulty[edit]
On the right hand side, you can modify the difficulty settings for this fortress. These settings can also be changed at any time after embark, except for the (siege) invasion caps. The two categories, "Enemies" and "Economy" are presets for those in "Custom settings".
The enemies settings affects how attacks against your fortress can occur. The "Off" preset prevents sieges, megabeast attacks, werebeast attacks, and agitated wildlife, although on site hostile wildlife and environments will be unaffected. "Hard" allows these attacks to occur at roughly half the population and wealth of a fortress set to "Normal".
The economy settings affect how much population and wealth is needed to unlock landholders and fortress ranks, how much value is required to increase the quality of zones, and how often nobles can make demands and mandates. With "Hard", the wealth needed is five times, the zone value is triple, and the noble period is half that of the "Normal" difficulty.
Play Now![edit]
You can forgo the process of assigning skills and supplies and instead select Play Now! This option will give you a selection of dwarves, with the following profiles:
- Miner: Proficient Miner, Skilled Appraiser, and Novice Judge of Intent
- Woodworker: Proficient Carpenter, Competent Woodcutter, Novice Bowyer, and Novice Wood Burner
- Stoneworker: Proficient Mason, Adequate Stonecutter, Adequate Stone Carver, and Novice Engraver
- Metalcrafter: Proficient Metal Crafter, and either Proficient Stone Crafter or Competent Gem Cutter and Adequate Gem Setter
- Fisherdwarf: Proficient Fisherdwarf, and Proficient Fighter
- Planter: Proficient Planter, and Proficient Record Keeper
- Expedition Leader: Adequate Organizer, Adequate Persuader, Adequate Negotiator, Adequate Conversationalist, Novice Liar, and Novice Intimidator
The default embark value for a custom embark is 1504 embark points. Usually, 1040 points are spent in pre-chosen goods (although more can be spent if your civilization lacks iron or copper), 54 points in dogs and cats, and the remainder is allocated towards assorted animals and copper weaponry. The Play Now! embark can even run over the default 1504 points. Generally though, it is better to Prepare Carefully once you know what you're doing with the set up of an early fort.
Prepare Carefully[edit]
Preparing allows the player to customize their embarking party and supplies by applying 10 skill picks to each dwarf and spending points on items and animals. The total value of embarking is set at 1,504 points, though all but 544 of these are pre-spent on an array of basic equipment (mostly the same equipment that Play Now! uses). It stands to reason that one should try to maximize the value of their embark by spending all available points. Remember that raw materials cost less embark points than their pre-made counterparts. By preparing carefully it is also possible to name your fortress and your embark group, as well as choose a custom group symbol.
It is possible to change the amount of available embark points when playing via advanced world generation, where presets can be created and/or customized. The maximum amount of embark points a generation setting can have is 10,000.
Skills[edit]
At embark, all seven settlers begin without ranks in any skill except performance skills. Each dwarf can be assigned 10 additional ranks to be allocated however you please among the entire Dwarven skill list – including military – with the restriction that no skill can be increased more than 5 ranks. Therefore, you can trade off specialisation against versatility: each dwarf may be 'proficient' in two skills, or minimally skilled (rank 1, 'Novice') across 10 skills, or anything in between. Not all ranks need be allocated. The current skill rank is shown to the left of the skill (e.g. Novice). Skills do not cost embark points, so all 1504 embark points can be allocated to items and animals.
The value of a rank is subject to further scrutiny given the early-game value, or lack thereof, of certain skills as well as the relative ease or difficulty of training ranks in a given skill. Many skills are performed just as well by a Novice (skill level 1) or even a Dabbler (level 0) as they are by a Legendary (level 15+). A Novice Furnace Operator won't produce Coke as fast as a Legendary Furnace Operator, but they will produce it fast enough to keep their neighbor smelting hematite until the cows come home. Additionally, embarking with Novice or higher skill will automatically enable the corresponding labor, avoiding manual labor assignments upon arrival.
For a more complex example, there is much overlap between what can be produced out of wood and what can be produced out of metal, but wood is plentiful in the early game (often throughout, if a tree farm is established, and caravans will bring in several pages worth of wood if you request it) while metalworking can take much longer to establish, or would take several times longer to produce a given product in the early game due to the multiple steps required. Metalworking skills also train slower than woodworking, and metal products have a longer base production time than wood products.
From one point of view, the Woodworking skills would be of more immediate use in producing quick goods of higher value in the early game, especially given the high volume needed; however furniture quality is of little concern in the early game, and the high volume of value-independent goods (such as barrels which you won't be trading away on their own or using to furnish chambers) will cause your carpenter to train his skills fairly quickly. Even on a strictly functional level, a Novice carpenter can produce beds, barrels, and bins fast enough to keep up with a fledgling base. Lastly, once metal production is up and running, it can be agonizingly slow if a Farmer or Peasant has to be reassigned to learn from scratch, thus a proficient Metalsmith stands to pay off much more in time than starting with a proficient Carpenter. Consider as well that you may receive a highly skilled Metalsmith during an immigration wave, if you care to take that chance.
Supplies[edit]
The default array of supplies covers a broad range of foodstuffs, seeds, drink, tools, and medical equipment, and is reasonable, though extra food and drink never hurt anyone.
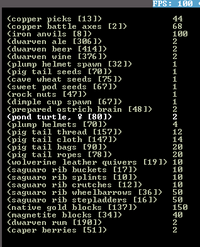
- 2(3)† Copper picks (or bronze picks if your home civilization has no access to copper)
- 2 Copper battle axes (or bronze battle axes if your home civilization has no access to copper)
- 1 Iron anvil (or steel anvil if your home civilization has no access to iron)
- 1 Wheelbarrow (if possible)
- 1 Stepladder
- 60 units dwarven alcohol (at least 20 each of up to 3 random types, in 12 barrels)
- 6 bags containing 5 seeds of each of dimple cup, cave wheat, plump helmet, sweet pod, pig tail, and quarry bush.
- 15 units of meat (one random type, 3 stacks of 5 units in 1 barrel)
- 15 units of fish (one random type, 3 stacks of 5 units in 1 barrel)
- 15(30)† units of plump helmets (in stacks of 5 units in 1 barrel)
- 5 pig tail fiber thread
- 5 pig tail fiber cloth
- 5 pig tail fiber bags
- 3 pig tail fiber ropes
- 3 leather quivers
- 3 wooden buckets
- 3 wooden splints
- 3 wooden crutches
- 2 female dogs†
- 2 female cats†
- up to 5 assorted domestic animals†
- copper battle axes, maces, short swords, spears, and war hammers† (or bronze if your home civilization has no access to copper)
- 2 random domesticated pack animals (These 2 pack animals are always given and don't cost embark points for players "preparing carefully".)
† These are only included by default in the Play Now! package. To start with them when you "Prepare Carefully", you will need to add them in.
Considering Metals
- If your civilization lacks copper or iron (or both), the increased costs for standard-issue metal equipment can eat up the embark point advantage that Prepare Carefully has over Play Now!, but the option to customise point allocation still gives careful preparation an edge.
- If your home civilization does not have access to copper, you will start with bronze picks and bronze battle axes instead.
Considering Materials
- When settling on a site with few trees, one should definitely consider bringing extra logs to cover the early demand for beds and such.
- You may also want to consider replacing the pig tail fiber items with much cheaper cave spider silk items (regular, not giant).
- Note that the types of supplies available can vary depending on what materials are available at the nearest capital of your civilization. For example, certain types of stone or bars may not be listed at all, if they are not available at your Mountainhome.
- Pre-made items (weapons, armor, furniture, etc.) cost more embark points than their constituent raw materials, consider this when maximizing embark efficiency.
Considering Animals
- Do not overlook the value of bringing animals. Dogs in particular can provide an excellent early warning system, good fighters against kobolds and other thieves, and a healthy supply of meat and bones. Cats are useful for controlling the vermin population, but beware the dangers of a catsplosion.
Those Parentheses
- All the items (not animals or dwarves) that you are bringing with you from embark will appear with between parentheses. Example: (copper pick)
- Items you manufacture (or obtain by mining/farming/foraging/scavenging) will not have the parentheses.
Saving a starting mix[edit]
Once you have the mix of items and skills that you like, you can save it to a template with a custom name. In a later game, you can pick that profile when you embark. If your selected civilization does not have some of the desired items in your template, this is announced clearly, and a different civilization can be tried as described above, or you can continue and change your mix.
If you match skills to the preferences and personalities of your dwarves, it may be an idea not to include any skills in such a template, as they will simply be applied in the original order to the current dwarves as they appear on the list.
If you find additional items that you wish to add (perhaps another type of cheap meat, or an ore not previously available), you can overwrite your old template by using the same name. You can also go into the embark_profiles.txt and edit in the SKILLS or ITEMS as you want - the syntax is fairly straightforward. Embark profile repository contains examples of different profiles you can experiment with.
Embark Strategies[edit]
The strategies below are suggestions. They are not universal, and many are even contradictory. This is because there is no one true way to play Dwarf Fortress. Some may not work for you because of unstated assumptions about priority, value, fun, or procedure. However, since Losing is Fun, it's always worth it to try something out, even if it doesn't go well.
Picking the Right Location[edit]
Need More Dirt - three layers of soil before the stone layers begin provides a very large area that can be used to quickly carve out efficient storage rooms, as well as easy construction of large farms and tree farms without the need to flood/muddy large areas of stone.
Flowing Water (and its inverse) - Flowing water (river or stream) is a must-have for the infinite power it supplies for working machinery, and because underground water supplies are too dangerous to tap into. There is no guarantee of infinite water underground, you could embark on a map with completely dry caverns. However, rainier climates will always have murky pools, which, with careful management, can be refilled from the rain. Infinite power for working machinery can be created using a limited amount of water in a perpetual motion machine, although, being limited in quantity, murky pools simply do not have the capacity to permanently flood your fortress, while a single mistake with an infinite source can easily do so.
FPS - often overlooked, this is perhaps the most consequential decision you will make during embark. FPS drops slowly as fortresses get more people, and create more stuff (the game has to simulate all of these people and the stuff they are making). Having a site that takes little resources to simulate can go a long way to mitigating this problem. The major FPS-eaters to look out for are trees (deciduous trees especially, as they shed their leaves annually), and flowing and/or falling water (the latter being worse on FPS). See the article on Maximizing framerate for considerations. Of all the things you can ignore to help with FPS, picking a new site is not one of them. Planning for this early on will save you a lot of headaches if you manage to keep a fort alive for more than a decade.
Preparation Strategies[edit]
Free Barrels - many products are stored in bins, barrels, or bags and do not stack with other items even if they're in the same broad classification. Plump Helmets and Horse Meat come in separate barrels even though they're both food. Purchasing a single item of food will also produce a free barrel for it to be stored in. As barrels have a cost of 10 to buy empty, buying a single unit of cost 2 foodstuffs gets you a value of 5. Anything above cost 2 bought for the express purpose of getting barrels would be better off just buying barrels empty or raw logs. This concept can be extended to many different goods, and for any stored good you were "going to buy anyway". Alcohol will come in a new barrel after every 5th unit.
- Note that meat products from the same animal will store in the same barrel, thus 1 unit of Horse Meat and 1 unit of Horse Tripe will only get you one barrel, not two.
- Upon arrival you can build a kitchen and prepare lavish meals out of all those single units of meat. This will "compress" your food, and free up some barrels for brewing. Size of stacks of food from cooking is equal to sum of stack sizes of ingredients, so you lose nothing.
Cheaper food - you can bring lots of milk (worth 1 embark point each), build a farmer's workshop, and make cheese out of that milk. Combine this with the trick for free barrels, cook lavish meals out of that cheese and meat, and you will get some free barrels, and good quality food for cheap. Making milk into cheese is very fast and requires no skill, you just need to enable cheese making on your cook or brewer. Pick 1 unit of milk from each species and each one will come with a free barrel.
- To save on alcohol (you should probably still bring some of it, though) get plump helmets for 4 embark points each. Remember to disable cooking them in z -> Kitchen menu. Build a still, and brew them all, each will make 5 units of alcohol. You can supplement this with gathering and brewing local plants.
- Cooking lavish meals out of 1 unit of meat, and full barrels of alcohol made on the spot from plump helmets (known as booze cooking) can produce even more food, but only if one knows how to do it.
- When choosing all that different food, be smart. Press "n" Go to "Meat" section, press "e", and search for one particular kind of food, "meat", for example. Press enter, rinse and repeat. This way, you can quickly add food from different animals and be sure you don't have any 2 foods from the same species. Also, it's good to make a template so you won't have to do the whole thing all over again when you start another fortress.
Cheap Bags - while even the cheapest bags (made from cave spider silk and low-value leather) cost 10 points each, you can instead simply bring several units of sand costing 1 point each, as each unit of sand will be stored in its own bag made from a randomly selected material (including giant cave spider silk and valuable creature leather).
Don't Really Need That - unless you have tailored your embark for metal production quick and early, an anvil is typically unnecessary and the 100 points you get from refunding it can be better spent on skills or additional foodstuffs (can't really have enough foodstuffs). By the time the Dwarven caravan arrives in the fall, a 100☼ iron anvil, or even a 300☼ steel anvil, should be little more than an inconvenience. This can sometimes be problematic Fun if you are unlucky and the caravan does not bring an anvil.
REALLY Don't Need That - For players more familiar with the game. Bring no pre-constructed goods (weapons, buckets, etc.), just the materials to make them with. This requires several (3-10, though you're likely to bring way more) logs, some fire-safe stone (ores are fine if you don't mind some micromanagement), a few nuggets of copper ore, and an anvil. Upon arrival, build a Wood Furnace and a Forge, make charcoal, then picks for the miners and an axe for wood cutters.
Medical supplies should be unnecessary to start with, because if you need them you're screwed you'll have Fun. You may want to bring some rope (or just thread) along though.
Yes, I Do Need That - DON'T EVER leave without alcohol unless you have a brewer and a way to gather plants early (untrained herbalists designated after embarking are enough) or a safe water source (preferably flowing). Be sure to bring multiple types of alcohol, as your dwarves will be happier this way, because the different types will encompass their numerous preferences.
More Means Better... Right? - Perhaps you once thought that the default amount of embark points aren't enough for you, and that you could give your fortress a serious leg up in getting started if you embark with much more animals and supplies. This can be done in a few ways: The first way is entering the "advanced world generation" screen and creating a custom world generation preset with higher embark points. Note that only a maximum of 10,000 points can be entered without cheating or hacking. The second way is to repeat the first step, but modify the world_gen.txt file found in the [game dir]\data\init\ directory - modifying the [EMBARK_POINTS:#] line with any custom number and saving, which can be set above 10,000. The third way is to simply use the "points" command if using DFHack, once a world is generated.
Back to the original question, does more mean "better"? The answer: yes and no. Starting with way more supplies and animals can give you a huge starting advantage in already having the materials and then some to get your fortress going, and having the extra animals can be useful for early breeding and butchering. The extra supplies/animals can also provide a huge advantage in trading. However, having extra supplies can also hurt gameplay, as having too much of something can hamper the chance for a dwarf to make something themselves, giving them less opportunities to increase their skill levels. And having too many animals can be a pain to manage, especially once they start breeding and make this task harder. However, this can be rectified by butchering some of them. Also, bringing too many supplies with you can have dwarves putting things away from the wagon for a much longer time than normal. This can be a massive nuisance if starting out in harder embark locations where early attacks are likely, or if thieving creatures come by.
See also[edit]
- New players may find the Quickstart guide useful.
- The Starting build article has more detailed embark strategies.
Trivia[edit]
- It is possible for animals to be stuck up in trees at the moment of embarking. This will cause them to starve to death after a while as they have no means of getting down. So the player should check higher z-levels above the wagon once the playing area is generated, and immediately cutting down any trees animals are stuck in.
