- v50 information can now be added to pages in the main namespace. v0.47 information can still be found in the DF2014 namespace. See here for more details on the new versioning policy.
- Use this page to report any issues related to the migration.
Trap
v53.12 · v0.47.05 This article is about the current version of DF.Note that some content may still need to be updated. |
- For information on trapping vermin, see animal trap.
- For complex, multi-tile configurations, see trap design.
Traps are a relatively quick and easy method of defending a fortress. Unlike soldiers, they're always on duty, and, once set up, need less management. On the other hand, they are immobile and can only lie in wait for foes to walk over the 1 tile they (each) occupy. Traps can be built from the build->traps menu. Most traps need one mechanism, a dwarf with the mechanic labor designated (higher skilled mechanics take less time to build a trap), and at least one other component depending on the type of trap – a stone, a cage, or one or more weapons. They can be built indoors or outdoors on a vacant floor (natural or constructed). Traps will block the passage of caravan wagons, but not traders or their caravans with only pack animals.
Stone-fall, weapon and cage traps will be triggered by most hostile entities entering their tile, with the possible exception of thieves, flying creatures and other occasional fun surprises. Also some invaders may recognize some of your traps and avoid them if they can. Any unconscious creature will trigger traps, including your own dwarves. Conscious dwarves, guests, allies, caravans and domestic animals do not set off self-triggered traps.
Trap management[edit]
Making mechanisms, setting up traps, and constructing a variety of other buildings all require the mechanics skill. Only mechanisms have a quality level so it's a good idea to enable mechanic on the general work force of your fort and restrict mechanic workshops to skilled workers with the profile manager. Clogged traps and triggered cages will generate a "load trap" or "clean trap" labor even if said traps are forbidden. This could quickly send your dwarves into a danger zone as they go to maintain it. This can be prevented by drawing a burrow around said traps, assigning no one to it, and toggling the burrow to restrict all workshops on it to the burrow. Strangely this will also work for the traps (likely because the behaviors that check for jobs is not building-specific, but area-specific, so all jobs generated in the area must be undertaken by those in the burrow). Your dwarves will not touch the traps until the burrow is unrestricted.
Note that only dwarves with the mechanic labor enabled will reload cage, stone, or weapon traps. In combat situations, mechanics have a nasty habit of wanting to reload (or clean) traps when they are triggered, regardless of who or what might be near them. Forbidding traps after they are built will keep Urist McSuicide from deciding to reload a trap in the middle of a siege. Just remember to unforbid them when things calm down, so the traps are all ready for next time. Note that forbidding a trap after it has been triggered doesn't help, as the job to refill the trap has already been issued in that case, so a mechanic will carry a stone out to the trap anyway. Alternatively, simply order your dwarves to stay within a safe burrow until any threats have been dealt with.
If a cage trap has captured something and has been left alone for an extended period of time (nearly a year or longer) the caged individual escapes and you will get the announcement "Something has emptied a cage!". If put into a stockpile or claimed, captured individuals will be prevented from escaping, but may suffer hunger.
It is possible to determine the state of a trap (loaded/unloaded) and the components it contains using the t query.
Traps can be deconstructed by pressing t to view the trap (or q, although the name of the trap will not be displayed until it is flagged for removal), followed by x to remove it. Deconstructing a trap leaves the components used in its creation on the ground around the tile. Traps destroyed by hostile action may return damaged objects.
Mechanism quality[edit]
All of the traps listed below, other than Upright Spear*, use mechanisms in their construction. For weapon traps and stone-fall traps, the quality of the mechanism used determines the skill level with which the weapon is swung or fired or the boulder is flung:
- Basic - Dabbling (0)
- -Well- - Competent (3)
- +Fine+ - Talented (6)
- *Superior* - Professional (9)
- ≡Exceptional≡ - Master (12)
- ☼Masterwork☼ (including Artifact) - Legendary (15)
Mechanism quality has no effect on cage traps.
- (* Upright spears can use a mechanism to trigger or automate them, but the mechanism quality has no effect on damage)
Types of traps[edit]
There are 4 types of traps; the player selects which type, and selects any specific components, when they designate the trap to be built:
- Stone fall trap: drops a single stone on the target, then needs to be re-armed
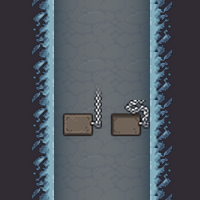
- Weapon trap: attempts to hit the target with 1-10 weapons, selected from weapons available to the fortress. No re-arming necessary, but subject to being jammed by a corpse
- Cage trap: traps the victim in a cage, which must be provided; once caged, the cage and prisoner can be moved, and the trap re-armed with a new (empty) cage
- Upright spear/spike: just that, 1-10 spears or spikes in the ground; can be passive (to make a fall more lethal), or linked to a trigger and/or automated (to poke repeatedly)
Stone-fall trap[edit]
The simplest trap to construct, a stone-fall trap is essentially a stone suspended up in the air which is dropped on intruders when the trap is triggered. These are a popular defensive measure early on, as the components needed are readily available as soon as you start mining. A single stone trap will usually not severely wound or kill most animals and enemies, but can break a bone, which gives you more than enough time and advantage to finish them off with military. The weight of the stone used in the trap affects the amount of damage the trap does.*
- (* It can be difficult to get your dwarves to use heavier stones, like galena or cinnabar, when loading the traps. Patient micromanaging from the z/stock menu and/or using forbid often does the trick. Consider a dedicated "heavy stone" stockpile near the trap, possibly with a door that can temporarily seal the dwarf, trap and stockpile together, so that's the only (or at least nearest) choice they have.)
After each use, a stone-fall trap needs to be reloaded with another stone. This is done by any dwarf with mechanic skill enabled, a task which your dwarves will see to automatically. The dwarf will generally not use the stone that just dropped, but a new one (would you want to put your hands on that gory mess?). Being that stonefall traps do not alert you of ambushes when triggered by hidden invaders* (the way cage traps do), and automatically trigger a "reload" job, this can frequently lead your mechanics into peril. You can make your mechanics' lives a lot easier and longer if you disable that labor during sieges or burrow them away from the enemy.
- (* For something a bit more complex but quite elegant that will notify you, see land mine.)
Stone-fall traps respect economic stone restrictions (which can be changed under Labor/Stone Use). Stone-fall traps cannot be loaded with clay.
Before you write off stone-fall traps as worse versions of weapon traps (see next), note that weapon traps require you to have previously made, found, or traded for those weapons, making them more of an option somewhat later in the game, and then haul and install each, making the completed trap very time consuming. A stone-fall trap only requires a quick mechanism and a stone.
- Shortcut b t t
- Components used: mechanism and an ordinary stone
- Appearance: ^ = ready, ^ = no stone loaded
Weapon trap[edit]
Weapon traps are similar in nature to stone-fall traps, and are triggered when any hostile creature steps on the trap. They contain up to 10 weapons, chosen when placing the trap, and can inflict grievous injuries. However, it takes time for the trap's weapons to trigger; enemies who move quickly across the trap may survive unscathed, as the weapons will not hit a creature which has moved off the trap.
When placing the trap you will be asked for a type of mechanism as normal, then asked to select weapons to use. The quality of a trap's mechanism influences the attack rolls of its weapons.[1]. At this point you will get a list of all stockpiled weapons in your fortress. +- will select different weapons and pressing "Enter/Return" adds 1 of the selected weapon to the trap; you can expand the selection to choose more carefully. Up to 10 weapons can be put in each trap and all weapons in the trap will attack at once when it is triggered. When happy with your weapon selection press d to set the trap.
Any weapon can be used, including poor-quality efforts by your weaponsmith, training weapons and any non-dwarf weapons you have traded for or recovered from dead goblins. Think of it as fair retribution when goblins are sliced to pieces by their own daggers and whips!
When you add a ranged weapon such as a crossbow to a weapon trap, appropriate ammunition is automatically added and does not need to be selected. One bolt (per crossbow) will be fired each time the trap is triggered, and when those run out, the trap will signal a "reload" order and stop firing. Bows and blowguns can also be used, though since your dwarves cannot produce arrows or blowdarts themselves, you will need to harvest your ammunition from your enemies (or acquire them via caravans, in the case of arrows).
You can also use the corkscrews that are normally used in screw pumps, or any of the other specialized trap-only weapons:
Trap Weapons Metalsmith's forge Carpenter's workshop Glass furnace menacing <metal> spike menacing <wooden> spike menacing <glass> spike spiked <metal> ball spiked <wooden> ball spiked <glass> ball enormous <metal> corkscrew enormous <wooden> corkscrew enormous <glass> corkscrew large, serrated <metal> disc (not available) large, serrated <glass> disc giant <metal> axe blade (not available) giant <glass> axe blade
- Don't know which to make? See Trap component for a full discussion.
These "trap only" weapons have all the material property advantages and disadvantages that normal weapons have, though they're massively less durable. It should be noted that the trap weapons are larger than normal dwarf weapons, meaning they should be more effective than normal weapons made of equivalent materials. When triggered, this trap will "attack" the creature with all the weapons available to it, normally doing massive damage. This can also be very messy if the trap is loaded with cutting weapons, often creating an explosion of blood and dismembered body parts. Using blunt weapons reduces the mess somewhat, and you may wish to strategically place a Dwarven Bathtub nearby. See Trap component for a full discussion.
Weapon traps do not require slightly suicidal mechanics to reset them after each triggering but instead reset automatically after an unknown period of time. However, there is a 50% chance that a kill will result in the victim getting stuck in the mechanism and cause the trap to jam (use t to check the trap), requiring either a dwarf or other methods to remove the body. Whenever a trap jams, a mechanic will automatically attempt to clean it if they have a path, so forbidding the body (or forbidding the trap's mechanism in advance) may be necessary to save him from the victim's friends. Note that weapon traps will only jam if they directly kill the creature – if they instead inflict a mortal wound and cause the creature to bleed out, they will not jam.
The triggering creature will defend from the trap's attacks just like from a dwarf's, by jumping away, dodging and blocking. This can be used in your favor if the trapped tile happens to be mostly surrounded by long falls into spikes, or other welcoming gestures.
- Shortcut: b t o
- Components used: mechanism and whatever weapons you want, limit 10.
- Appearance: ^ = ready, ^ = jammed or out of ammo
Cage trap[edit]
Cage traps are different from the other trap types in that they do not directly kill or injure invaders. Instead, they capture the creature that triggers them in a cage. Despite the unfortunate lack of violence, this is still very effective as it completely neutralizes the target so that it can be dealt with later. After a creature is captured, it's stored in an animal stockpile if the current standing order is set (o-a). The trap will then be reset by hauling an empty cage to the trap's location. This is done automatically by any dwarf with the Mechanics labor enabled, but only when permitted by the Trap Rearming standing order. Cage traps will also alert you to ambushes when triggered by hidden invaders, making them a useful forward defense mechanism.
Most captured creatures do not require any nourishment and will survive being in a cage indefinitely; in fact, even submersion in water appears to have no effect on caged creatures. It is possible for dwarves to bring water to cages, but this will only occur if you have someone friendly also locked in the cage – like a dwarf child snatched by a goblin. See below for how to remove things from a cage. During sieges, caged companions of the attacking faction can be freed.
Magma can be used to 'clean' magma-safe sprung cage traps and cages that are built or stockpiled, removing non-magma safe materials (and creatures) from the cage. Non-magma safe cages are destroyed as well.
Cage traps will not capture every creature in the game, so you will need alternative defenses – titans and forgotten beasts (as well as certain other types of creatures) are immune to traps entirely and will waltz right past all of your carefully placed cages unless the cage has a giant cave spider web on it. Some creatures are nimble enough to avoid setting off traps, or even escape it completely once triggered. A webbed cage trap will capture nearly anything (including even your own dwarves); the only creatures it cannot capture are those immune to both cage traps and webbing, such as a web-spinning forgotten beast or a dwarf from your fortress on a Collect Webs job.
Cage traps are also useful for catching wild animals. This can be done by simply placing traps in areas where wild animals roam (this does not require a dwarf with the trapping labor enabled). The captured animals can be tamed (and sometimes trained into war animals!) at any animal training zone. See Animal trainer for more on training animals.
In the process of taming a wild animal, there is a chance that seeds will be left in the cage. Dwarves only load empty cages into traps. One way to remove the seeds and make the cage usable again is to dump them. First look at the cage in your Animal stockpile, then highlight the seed and press Enter to look at the seed, then press d to dump the seed.
The material a cage is made affects indirectly the speed at which it is loaded into the trap. Heavier cages take longer to load. The more skilled a dwarf is in the Mechanics skill, the less time they will take to load the cage.
With exception to the latter, cage material has no effect (beyond weight for hauling, value of finished trap, and the fact that elf merchants will get angry if the cage is wooden). A glass terrarium is just as strong as a steel cage.
To release a creature from a cage, build the cage (b r) g) and use q to unassign it. You can also simply assign the creature to a pasture or pit. To release a hostile creature (or wild animal) safely from a cage, build the cage and link the cage to a lever that can be remotely triggered. If you have many cages you need to empty out quickly see Mass pitting. Cages have no current limit to the amount of beasts you can put in them, so you can build one cage and assign all the beasts to that cage. Typical caveats of dealing with wild/hostile animals apply.
As with most traps, if a dwarf goes to sleep or is knocked unconscious over a cage trap, it will be triggered and the dwarf will be trapped. Unlike usual creatures, a caged dwarf can starve or die from dehydration.
Upright spear/spike[edit]
The previous 3 types of traps trigger when a hostile creature steps on them. An upright spear/spike trap is different – it must be triggered externally to cause the spears or spikes to spring up or to recede back down. Unlike the other traps, the spike trap does not discriminate between friend or foe – when the spears/spikes spring up, any creature on that tile will be subject to possible impalement by them. Note that this trap only does damage at the exact moment that the spikes spring up – once up, they do nothing (unless something falls on them from a height) until they come up again.
If you simply want upright spikes on a tile, placing the upright spear/spike trap does not require a mechanism and it does not require the Mechanic labor. Static spikes only require 1 to 10 spears or spikes. Without a link, the trap will not operate, but can still do additional damage to anything that falls on that tile (see below).
Linking it to a lever or a pressure plate will require a mechanism and must be performed by a Mechanic. Mechanism quality has no effect on accuracy or damage. Retracting the spears/spikes does not require space in the z-level below the trap. Spike traps do not jam.
When linked to a lever or pressure plate, a close signal will cause them to spring up, while an open signal will cause the spears or spikes to recede. Most repeaters do not cycle very quickly, so, with only 1 trap, it is easily possible for a unit to walk onto the trap tile after it has sprung up (and is harmless) and then on past it before it goes down and comes up again – multiple traps in a row can be a good idea.
At the risk of stating the obvious, if you plan to recover the bodies or goblinite left by victims of an automated spike trap, you should also plan some way to turn them off during that recovery. Or not.
An often overlooked ability of an upright spike trap is that it also inflicts damage on a creature that falls onto it while it is deployed. And since they are built in the deployed state they can be quickly built to make a pit trap more lethal, without the need for extra mechanisms. However, you will still need some way to cause your victims to fall onto the spike from above in the first place, and the pit must be more than 1 z level deep for the spikes to cause damage.
- Shortcut: b t u
- Components used: 1-10 spears or spikes, plus further mechanisms for linking to triggers.
- Appearance: | = extended, . = retracted
Other traps[edit]
Main article Trap design
You can create even more elaborate traps with imaginative use of pits and other long falls, pressure plates, levers, grates, supports, retracting bridges, water and/or magma, and other features, creating sacrificial altars (blood for the Blood God!) or whatever else your warped mind can think of. Watching those goblins try to find a way out of your drowning chamber as it begins to fill is really quite satisfying. These are best made in a large, automated, repeatable mass killing way. If you make a trap that kills a couple dozen goblins but only works once before you have to rebuild/reset it, wasting time you don't have during a siege, then you're not trying hard enough asking for too much fun.
Trap location[edit]
Enemies will tend to take the shortest path to their target, be that your dwarves, an animal, a single valuable item or a child to be kidnapped (in the case of thieves), or a door or statue (in the case of building destroyers). Putting traps at the inner corner of a turn in a hallway, or in front of a door or the start of a stairway - or just lining* a long hall - gives you the highest chance of a victim walking over the trap.
- (* Remember that caravan wagons cannot pass over traps, although traders with pack animals can. Making a hall extra wide, with lots of turns, can allow you to trap the "short path" while the wagons will take the longer path outside the traps. More complicated pathing can be created as well, anything that allows the wagons access and invites invaders to the traps.)
One of the harder targets to trap are wild animals, since they do not "target" anything, and tend to avoid dwarves. Using walls, you can construct a cross-shaped "funnel" with a gap in the center, and place one or more traps there, and hope the wandering animals will path through that gap rather than around the walls. For flyers, this can be multiple z-levels high, and may start to take on some aspects of a megaproject.
You also have to think about servicing the traps. Stone traps need to be reloaded, cage traps need to be collected, and weapon traps often need to be un-jammed.. and then there's the bodies and any goblinite to collect, if only to dump. Planning the traps so they are close to (sealed?) access allows your mechanics to travel less distance to get the job done. Be aware of the possibility of building destroyers, which will laugh at your locked doors - clever use of hatches and u-bends that cross z-levels can allow safe access while preventing unwelcome surprises.
Note that some building destroyers are werebeasts, which are usually immune to cages but that have to change form to wreak their havoc. Placing a cage trap in a short side hall in front of a simple wooden door as "bait" near your entry (or multiple such cage/door combinations) can catch the were-creature while they are transforming and thus vulnerable.
Be aware that it can be dangerous for mechanics to undertake maintenance while the path is open to the wide, wild world. Making two similarly trapped paths, with a hatch or bridge or other control system that limits which one is "open" to outsiders, keeps your fortress open while allowing your mechanics to safely service the other area that is currently sealed. Using burrows may aid in controlling which areas they are allowed to access at any time.
See also[edit]
"Trap" in other Languages
|
| Furniture | |
|---|---|
| Tools | |
| Access | |
| Constructions | |
| Machine and trap parts |
Axle • Gear assembly • Lever • Mechanism • Millstone • Pipe section • Pressure plate • Roller • Screw pump • Support • Trap • Water wheel • Windmill |
| Other buildings | |
| Related articles | |
