- v50 information can now be added to pages in the main namespace. v0.47 information can still be found in the DF2014 namespace. See here for more details on the new versioning policy.
- Use this page to report any issues related to the migration.
v0.31:Quickstart guide
| This article is about an older version of DF. |
- This is a quickstart guide for Dwarf fortress mode for those who have never played before who quickly want to jump in head-first.
- If you are looking to learn adventure mode instead, see the Adventure mode quick start guide.
- Also see Tutorials for more detailed tutorials that people have submitted.
Always remember that losing is fun! Be prepared to lose a few fortresses before you get all the way through this guide – it can be easy to accidentally kill the entire fortress while learning. But remember: losing means that next time, you'll remember how you lost. In a big way, Dwarf Fortress uses the principle of learning from one's mistakes.
So, you want to play Dwarf Fortress, but you have no idea what to do. That's understandable; in Dwarf Fortress you can really do anything you like. It is a huge, complex, and totally open-ended game. But in order to do anything, first you need a sustainable fortress. It turns out that this is not as hard as you might think.
As this article doesn't always contain the exact key sequences needed to do everything described, you will likely need to refer to the Fortress Mode Reference Guide and the rest of the wiki while reading this. For something more detailed see the excellent Bentgirder tutorial.
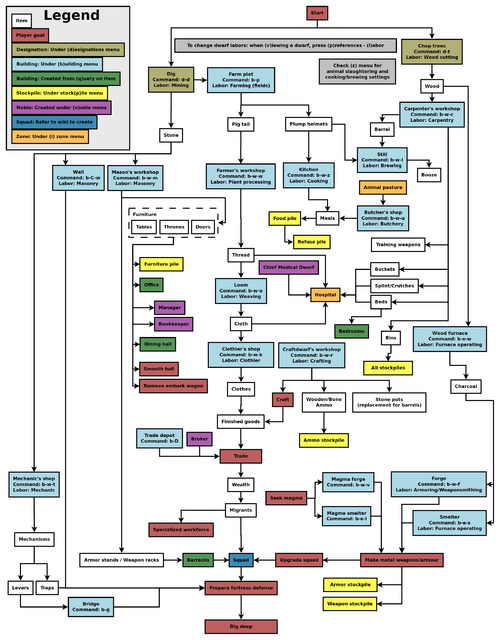
Common UI Concepts[edit]
While the guide contains many links, you may still need to look something up. Refer to the Fortress Mode Reference Guide or use the wiki search function. Also, don't hesitate to ask for help if you can't find answers on the wiki.
About key symbols
This wiki uses symbols that look like t or ![]() t to indicate what keys or interface buttons are used for an operation. Note that keys are case sensitive and to save space, Shift+t is shown as T. So t means "press the 't' key without the shift key" and T means "hold down shift and press the 't' key". Lowercase and uppercase keys will often perform different functions, so it is important to use the correct key. Sequences of keys will be in separate boxes, so abC means "press 'a', then press 'b', then hold shift and press 'c'"; while
t to indicate what keys or interface buttons are used for an operation. Note that keys are case sensitive and to save space, Shift+t is shown as T. So t means "press the 't' key without the shift key" and T means "hold down shift and press the 't' key". Lowercase and uppercase keys will often perform different functions, so it is important to use the correct key. Sequences of keys will be in separate boxes, so abC means "press 'a', then press 'b', then hold shift and press 'c'"; while ![]() b
b![]() T means "press 'b', then hold shift and press 'T'. A plus sign '+' between the boxes means to press them all together, so Shift+Enter means to hold shift and press 'Enter'. Other separators, such as ',' or '-', might be used but mean the same as no separator: to press the keys in sequence.
T means "press 'b', then hold shift and press 'T'. A plus sign '+' between the boxes means to press them all together, so Shift+Enter means to hold shift and press 'Enter'. Other separators, such as ',' or '-', might be used but mean the same as no separator: to press the keys in sequence.
Keybindings can be seen and changed on the Keybindings tab in the Settings menu.
| Esc or right mouse | Go back to the previous screen/menu |
| Mouse wheel | Scroll menu one line |
| Shift+mouse wheel | Scroll menu one page |
| Left mouse | Select menu option |
Esc or right mouse will almost always return to the previous screen until you get to the top level of the UI, at which point Esc will display the options menu.
World Generation[edit]
The first thing you will need to do is generate a new world. Unlike many games, the world that your game takes place in will always be procedurally randomly generated by you or someone else. There is no "default" or "standard" world.
Luckily the basic version of this process is rather simple, and doesn't usually take too long unless your computer is a bit outdated.
For your first game, generate a new world using the Create New World! option in the main menu with the following options:
- World Size is Medium
- History is Short
- Number of Civilizations is Medium
- Number of Sites is Medium
- Number of Beasts is Medium
- Natural Savagery is Very Low
- Mineral Occurrence is Frequent
This should help to avoid difficulties.
Pre-Embark[edit]
- Also see: Embark
Embarking is the process of choosing a site, outfitting your initial dwarves, and sending them on their way.
Select Start Playing from the main menu, then select Dwarf Fortress.
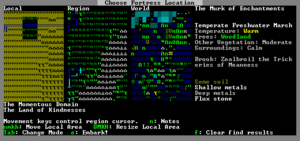
The map you see on the right is the World Map which will show you the whole world. The one in the middle is the Region Map which will show you a zoomed-in view of the part of the world indicated by the cursor in the world map. The Local Map on the left will show a zoomed-in view of the part of the region indicated by the cursor in the region map. In the local map area will be a highlighted embark region that you can move around with u m k h. This highlighted square is what will become your play area after you embark. Use ↑ ↓ ← → to move the region and world cursors around. Hold down Shift while doing this to move more rapidly.
Choosing a Good Site[edit]
Choosing a good embark site is crucial for beginners. Advanced players can create a functional fortress on a glacier, but for now, lets stick to dwarf (and newbie) friendly environments. You will want to look for certain features in your initial embark site that will make your first fort much easier to manage.
For your first game, find a site with the following properties:
- NO Aquifer (This is very important!)
- Trees: Forested or Heavily Forested
- Temperature: Warm
- Surroundings: Calm or at least not Sinister, Haunted, or Terrifying
- Clay or Soil is important to make farming easier when starting out
- Shallow Metals (That's Metals, plural, not Metal. You want more than one.)
- A River if possible
- Deep Metal(s) if possible
- Flux Stone if possible
You may want to use the find tool to help you find a site. Once the find tool has finished running, the general areas which it has found will be indicated by flashing characters on the map.
Notes about find tool: "Calm" is classified as Medium Evil, Low Savagery. (See the chart here for why.) The find tool will also only indicate a general area so you will still need to check the attributes manually by moving between flashing regions and by moving around in each one until you find the most suitable site.
The find tool may take 1-2 minutes to run, when it's done, be sure to press ESC to look around at the different sites it returns (look for flashing Xs on the world map). As you move your yellow X over the flashing suggested sites, the info bar on the right will tell you soil, minerals, aquifer, etc. Choose the one that looks best to you!
Your site may have multiple biomes overlapping it. If so make sure to press F1, F2, etc, to take a look at all of them. They may each have significantly different characteristics.
See Starting site for more info on why these characteristics are important.
Press e to embark once you're sure you have the right area highlighted on the local map.
Skills and Equipment[edit]
If, at this point, you'd like to get into all of the details of picking individual skills and equipment for your expedition, select Prepare for the journey carefully and see Preparing carefully for instructions. This is completely optional.
Now the Prepare for the Journey screen should appear. You will be given the choice to either:
- Play Now!
- Prepare for the journey carefully.
Selecting Play Now! will start you out with a default set of equipment that is reasonably safe, allowing you to skip having to set up your skills and equipment. If you'd like to get going now, just select that option.
A Minimal Fortress[edit]
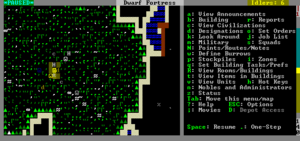
At this point you have embarked and your dwarves have arrived at their destination. You will see your dwarves clustered around their wagon full of supplies somewhere near the center of your map. Immediately hit Space to pause the game unless it is already paused.
Surveying the Area[edit]
Do not unpause the game just yet. Take a look around. Use the k command and the arrow keys. Look up and down a few z-levels with < and >. Place the cursor on various tiles to familiarize yourself with what the symbols mean. If you get lost, you can press F1 to return to the wagon. (You can define more hotkeys later, to jump quickly to other sites of interest.)
Notice the terrain features, the vegetation, and any minerals visible. If you chose a site with flowing water, where is it? What about pools of water? The more carefully you examine your site before breaking ground, the better off you will be.
Remember that this is more of a simulation than a game. It is not "play balanced", and you can very easily find yourself in impossible situations. That is all part of the fun because even when you lose, you create an interesting story.
Your wagon serves as the initial meeting area for your dwarves. Since you should have started in a non-freezing, calm (low savagery), non-evil biome, you shouldn't face any immediate danger, but if for some reason the area around your wagon proves to be unsafe, immediately designate another meeting zone using i (see Temporary Meeting Area below).
Controlling Your Dwarves[edit]
The first thing to keep in mind is that, for the most part, you can't directly control your dwarves the way you control characters in a typical fantasy RPG. Instead, you designate things that need to be done and then dwarves with the appropriate labor assignments will decide what to start working on based on a set of largely hard-coded priorities.
For example, if a dwarf needs to eat then he will go eat and only get around to digging a tunnel once he is done eating. It is also possible to designate things that no dwarf is able to do. For example, if you designate an area to mine but no dwarf has mining as one of his allowed labors or no dwarf has a pickaxe then the mining will never get done, and the game will not always advise you of why.
So what you are doing throughout the game is essentially giving your dwarves a detailed group-wide to-do list, but it's up to them to figure out which one of them will execute any given task if the task is even possible. Often many of the details of how a task is performed (such as exactly which rock will be used to make crafts) are left up to them.
Strike The Earth![edit]
Generally, you will want to get all your dwarves and supplies inside a protected area as quickly as possible. So the first thing you will do is designate some areas to "mine".
Decide where you will build your main entrance. The best thing to do is just put it near your wagon to make it faster and less work to haul all of your supplies inside.
To designate an area for digging:
- Hit d to bring up the Designations menu.
- Hit d again to select Mine
- Place the cursor on one corner of the rectangular area you want to designate and press Enter
- Move the cursor to the other corner of the rectangle and press Enter. A rectangle will be highlighted and a miner dwarf will start to dig out this area once you exit the menu (with Esc) and unpause the game with Space.
This is basically how all of the designation commands work. Everything has to be designated one rectangle at a time, but rectangles can also be one tile wide, or just one single tile.
If your wagon is near a cliff, you can just designate a tunnel to mine (d-d) into the cliff to create an entryway. If you are on flat land with no cliff near the wagon, channel out a small rectangle (perhaps 3x3) on the surface with d-h to create a sort of pit with ramps on the edges, then go down one z-level with > and tunnel into the wall of the pit to create your entry. (Think of this as creating your own cliff, with the inside wall of the pit being the "cliff".)
Dig a hallway one tile wide and at least 10 long, ideally more like 20. This will be your entryway. Later you may want to expand this to 2 or 3 tiles wide but for now make it narrow so it will be easier to defend.
Your entryway defines the boundary between your safe and protected inner fort, and the big bad outside world. You want this to be your only entrance so that you only have to worry about defending this one opening.
Delving Secure Lodgings[edit]
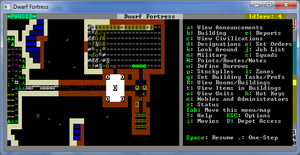
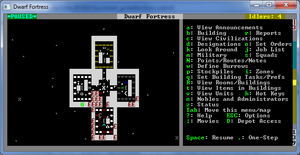
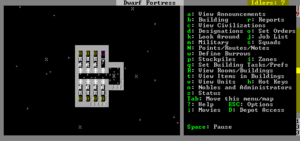
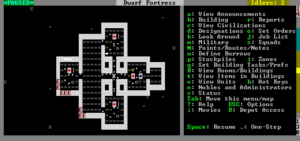
At the end of the entry hall, dig a 5x5 room (where you'll later build your trade depot). Then dig out at least another 3 or 4 tiles of interior hallway beyond that, and beyond that another room for a general stockpile area about 10x10 tiles. You have some flexibility in how you do this; see the image at the right for an example.
Don't make any of these rooms too big or your miner will take forever to dig the rooms out, especially if he is digging in stone instead of soil. (Digging through soil is much faster.) You may want to designate one room at a time, then wait for it to be mined out before designating the next room.
Stockpiles[edit]
Stockpiles are very important. These areas are where your dwarves will drop things for storage when they aren't needed elsewhere. To create a general purpose stockpile for your first storage area:
- Hit p to open the Stockpiles menu.
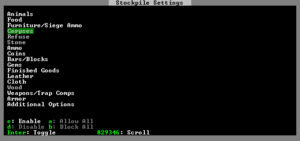
- Use t to change the custom stockpile settings to enable everything but Corpses, Refuse, Stone, Gems, and Wood. Use directional keys, enable, disable to do this.
- Esc out of that screen back to the stockpiles menu.
- Hit c to select Custom Stockpile.
- Designate the whole 10x10 storage room as a custom stockpile. This works just like designating an area to dig: place the cursor on one corner of the room, hit Enter, move to the opposite corner, and hit Enter again.
- Press Esc to get out of the Stockpiles menu.
Once you exit the stockpiles menu you should see dwarves running off to haul everything from your wagon into the new stockpile area. Later you can change what sort of things the stockpile accepts by hitting q (Set Building Tasks/Prefs), placing the cursor on the stockpile, then pressing s to get to the stockpile settings.
It is particularly important to keep wood, stone, refuse, and corpses out of your general purpose stockpile, so you may want to double check to make sure all of these things are disabled in the stockpile settings. Failure to keep these things out of this stockpile will cause problems.
Note- When assigning stockpiles, you should make sure they're in a vacant area. IE; the tiles should only "contain" the ground. Dwarves will not haul stuff to filled tiles, so make sure the area is vacant (Assign the area for dump) before assigning a stockpile.
Stairways[edit]
Somewhere off of your interior hallway, dig out a 3x3 or so area and designate a Downward Stairway in the middle of it with d-j. Notice that after your miner digs the stairway, it doesn't automatically create another stairway on the z-level below. If you hit > to move the view down a z-level you'll see that there's no stairway below, but there is a revealed tile of rock/soil. Because of the down stairway that was dug, this tile is now accessible to miners. You can then designate an Up/Down Stairway on it with d-i and the miner dwarf will dig it out. Below that you can then dig out another up/down stairway and so on. For now just dig down one level; we will deepen the stairwell later.
Stout Labor[edit]
Labors are how you control what types of tasks a dwarf will do. For example, if the Fishing labor is enabled for a dwarf, that dwarf is allowed to engage in fishing.
When dwarves are idle, it could be because you haven't given them anything to do, or it could be because none of the idle dwarves have been told that they're allowed to do the types of tasks you've designated. For example, if you designate an area to mine, but none of the dwarves have the mining labor enabled, they will all just sit around ignoring your mining designation thinking that it isn't their job.
Dwarves will automatically have some labors enabled if they start out with skill in those labors, and some labors (such as hauling and cleaning) are enabled for all dwarves by default. This is why you didn't need to enable any labors on dwarves to get them to haul and mine, but later you may need a labor that no dwarf is currently capable of.
You may have noticed that the UI for managing dwarves is a bit difficult to use. If you are using a supported operating system, the utility Dwarf Therapist can make this a million times easier, especially later when you're dealing with twenty times the number of dwarves you have now.
With the digging and stockpile taken care of, look over your dwarves' assigned labors. Press v (View Units) then place the cursor on a dwarf. Now, press p-l for "preferences: labors". You will see a list of labor categories that you can navigate using -+. You can enter each category and toggle each labor off and on with Enter and get back out with Esc.
After exiting the View Units menu, you can use u (the units screen) to help you locate dwarves. Hit u, select a dwarf, hit c for "zoom to creature" and you'll automatically be placed in view mode on that dwarf. (Then use p-l to get to the labor configuration menu if necessary.)
Even if no dwarves have the corresponding skills, ensure that someone has wood burner, furnace operator, wood cutter, plant gathering, gem cutter, armorsmith, weaponsmith, blacksmith, metal crafter, and engraver (stone detailing) enabled. If you have dwarves with hunting or fishing, disable those until you have your initial fort completed. When you're first starting out you don't want dwarves wandering around alone where they can get killed.
Any unskilled dwarf can perform any labor given the necessary equipment and materials. Dwarves with no skill will simply be slow and produce a smaller quantity of lower quality goods in a given time period, but they will gain skill points as they do so.
Temporary Meeting Area[edit]
Using the i key, create an activity zone (at least 5x5) in the stairwell or general stockpile area (be careful not to make this too small otherwise your animals and dwarves will start fighting). This works much like creating a stockpile except that you draw the rectangle first then hit keys to define what the area is for. Draw the rectangle over the area then set it to be a meeting area. Your idle dwarves will hang around in this area, hopefully keeping them inside the fort and out of trouble.
Refuse[edit]
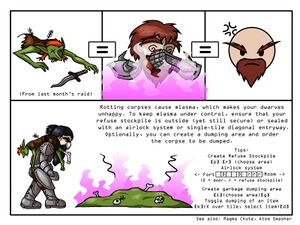
Outside your fort entrance, use p followed by r to create a stockpile for refuse at least 5x5 in size. This should be outside in the open or you will have problems with Miasma. You will probably have to expand it later as it will fill up with vermin remains rather quickly. If you are seeing refuse appear in your general-purpose stockpile instead of the refuse pile, use q on the general stockpile and check its settings to make sure refuse has been disabled.
Woodcutting[edit]
Create another stockpile for wood outside your entrance. As it will only be temporary, don't make it too big (maybe 5x3, or 15 tiles total). Later you will move this closer to your carpenter's workshop once you build one.
Press q, place the cursor on your wagon, and hit x to deconstruct it. This will flag the wagon for disassembly. Eventually a carpenter will come along and turn the useless wagon into a few units of wood. Removing other buildings is done the same way.
Also near the entry, designate at least 10 trees to be chopped down with d-t. Don't designate too many trees at the beginning, or your dwarves will spend all of their time chopping them down and hauling them rather than doing other work.
Pasture[edit]
If you have any grazing animals with you, such as the draft animals used to pull your wagon, they will die if they are kept away from grass for too long. Use i to create a Pen/Pasture zone over a grassy area outside and assign your grazing animals to it using N (while still selecting the zone). This area needs to be about 10x10 or so to ensure they have enough grass and don't trample it all.
Sustenance by Plow[edit]
Dig out an area in a soil layer, accessible from inside your fort but not reachable from the outside. You must pick an underground area with mud or soil. Hopefully you have chosen a site with a soil layer as this will make farming much easier, but if not then you will need to irrigate to create the required mud on stone floors.
Now use b to build a 3x3 farm plot. Notice that some things like buildings and constructions are not designated corner-to-corner like digging designations, stockpiles, or activity zones. Instead, you define the width and height of the "building" using umkh then position it with the directional keys. So hit uukk to make the plot 3x3 and position it in the room you just excavated.
Remember you must enable the "Farming (Fields)" labor for at least one dwarf or the farm plot won't get built and farming will not take place. (If you selected "Play Now" earlier then you will start with a dwarf with farming enabled.)
Esc out of the build menu and wait for the farmer dwarf to create the plot. Once the plot is built, use q to set the plot to grow plump helmets during all seasons. You will need to press a, b, c, d and select Plump Helmets for each season, otherwise you'll end up with an idle field for 3/4ths of the year.
Designing Your First Fortress[edit]
While this guide recommends a vertical fortress design around a central stairwell with each z-level being used for a particular purpose, it is really not that important to use this design for your first fortress. Therefore, feel free to put any of the areas described in the rest of this guide on your main level or wherever you want as long as dwarves can get to them without going outside the fort. In other words, you can think of the "levels" described in the guide more as areas that can really all be on the same level if you have space. Later you can ponder over what makes things most efficient, but for now just do whatever you find easiest.
To get stone though you may need to dig down a bit if you have more than one z-level of sand/clay/soil on the surface.
Workshops[edit]
Dig your stairwell down one level (with d-i), if you haven't already, and create four 5x5 rooms off of the stairwell. These will hold your mechanic's, mason's, carpenter's, and jeweler's workshops.
Use b-w to build the workshops, and select some sort of junk stone for the material. If you are still digging in soil and don't have stone yet, just use wood. (The material really doesn't matter in this case.) Put each workshop in the center of each room, and use the remaining space for the appropriate type of stockpile (wood for your carpenter, stone for your mason and mechanic, and gems for your jeweler.) If the construction of any building gets "suspended" just use q to unsuspend it. (This can happen if stone is blocking the way. See "Garbage" Dumping below if you find you need to remove some stone.)
Certain labors are crucial in setting up a fort. At some point you may want to disable less important labors such as hauling for dwarves with the crucial skills of masonry, architecture, carpentry, mechanics, and maybe others. You want these dwarves working on creating beds, doors, and trap components before hauling stone and cleaning.
Remove the temporary wood stockpile you created outside (using p-x) and dwarves will move the wood to the new wood storage area.
Go to your mason's shop with q and use a to queue up one table and one throne/chair. You will find out why you need these in a second, but now is a good time to start building them. If you still don't have any stone at this point just use wood at the carpenter's workshop.
"Garbage" Dumping[edit]
Note that garbage is not the same thing as refuse. Refuse is rotting stuff. Garbage is anything you designate to be hauled to a garbage dump, even important things that aren't really garbage. Think of your garbage dump zone as a way to specify that objects you select will be brought to a specific area.
Use i to create a 1x1 activity zone somewhere near your mason's and mechanic's workshops and set it to be a garbage Dump. Unlike stockpile areas where you are limited to storing one object per tile, any number of items may be piled in a garbage area. That means you will only need one tile to hold as much garbage as you like. Although many of the room sizes in this guide are suggestions, think of the 1x1 garbage dump size as mandatory. At some point you will probably want to retrieve an important item from your garbage dump, and the larger your dump is, the harder it will be to find anything in it.
Press d-b to get to the mass dump/forbid screen and select the dump option. With "dump" selected, designate a rectangle over all of the loose stones cluttering up your living area. This will designate this stone to be transported to the closest garbage dump zone.
Once the stone from your living area has been moved there, it will be set as forbidden. Before it can be used you will need to unforbid it using the same d-b screen, hitting c to claim it.
Congratulations! Knowing how to use garbage zones and dump commands puts you head and shoulders above most newbs. It takes some people weeks to figure this out.
Trade Depot[edit]
Build a trade depot using b-D in the 5x5 room you created near your entrance. This is where caravans will park their stuff and where trading will take place when one arrives.
Bedrooms[edit]
Continue digging your stairwell down about seven more levels. Just create the stairwells for now.
On the lowest level, dig some halls leading to rooms for sleeping quarters. Dwarves don't need much space for living quarters; in fact, you can turn a 1x3 room into decent quarters by smoothing the stone and filling it with some decent quality furniture.
Designing living quarters is a matter of personal preference and aesthetic sense. Actual design will be left as an exercise for the player. Just try to keep the bedrooms close to the stairs, and ideally make your access hallways at least two tiles wide so your dwarves don't have to crawl over and under each other to get where they are going.
You will want to create at least eight rooms: seven for your bedrooms, and one as an office for your manager/bookkeeper, which, rather than a chest, bed and cabinet, will contain the chair and table you queued up earlier.
Nobles[edit]
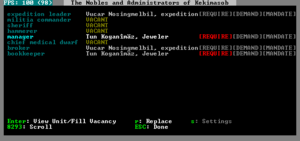
Hit the n key to open up the nobles and administrators screen.
The most important positions to assign are broker, bookkeeper and manager. Your expedition leader is a good choice for all three when starting out. Don't worry that it's just one dwarf doing all this; none of these jobs take very long.
Having a manager will allow you to queue up work orders which will greatly simplify managing your production. Having a bookkeeper will allow you to maintain inventory counts on the z screen so you'll know what you do and don't have. A broker is necessary to trade with a caravan once one has arrived at your trade depot.
Don't worry about the chief medical dwarf yet. He/she will be needed when you set up your hospital which won't be covered in this guide. Feel free to go check out the Healthcare guide once you're done.
Lastly, while you are on this screen, highlight the bookkeeper and set him to work for maximum precision. This will help train bookkeeping faster and ensure that you aren't dealing with vague inventory counts.
Offices[edit]
Some of your administrative positions (manager and bookkeeper) require an office in order to function. If your manager, for example, doesn't have an office, you will not be able to do any of the things that require a manager even though you have one assigned.
Earlier you should have queued up a table and throne in your mason's shop, and they should be done by now. Place them in the office (room you created down in the sleeping area) using the build command. Once dwarves have installed the furniture, use q to select the chair, make the room into an office, and assign the office to your expedition leader (who should be your bookkeeper and manager). Hit n to verify that these positions now have the office they need. If so then you shouldn't see any red.
Furniture[edit]
As you've noticed, some things have different names based on what they're made of (like chairs vs. thrones) even if they're functionally the same. So, if it seems like you can't make something of a particular material, do some poking around and check the wiki.
Now would be a good time to start building some furniture. You could queue up all these items directly from your workshops, but why not give your new manager a little practice?
Using the manager screen j-m, hit q to queue up a new job, and type "bed", and then select "construct bed." Set the quantity to seven. Next, queue up seven wooden chests or stone coffers, eight doors, seven cabinets, at least two tables and two thrones/chairs. The tables and chairs will go in your dining room, speaking of which...
Dining and Food Prep Area[edit]
Above the living quarters, and right off the main stairwell, create another four rooms. One will be for general food storage, one a dining hall, one a kitchen, and one a still. The still will allow you to make alcohol. The Kitchen will allow you to make Prepared food.
Make the rooms for the kitchen and still 5x5 each. The storage area and dining hall should be larger. Ideally make the dining hall so that it can be further expanded later.
Use b-w to build the still and kitchen in the middle of the 5x5 rooms. Create food stockpiles in the remaining space around each workshop, as well as the entire food storage room.
Go back to your general purpose stockpile on the top level and use q to change the settings to disable Food. This will cause any food in your general purpose stockpile to get moved to your new food-only stockpiles.
Hit z and select Kitchen from the top of the screen, then disable all cooking for plants and enable brewing for them so that they will only be used for brewing. Also disable alcoholic beverages for cooking, otherwise your cooks will waste perfectly good hooch in their cooking. The only time you might want to use alcohol in cooking is when you have lots of booze but are running out of food.
If you plan to do any fishing, dig out another area and create a Fishery on this level so the uncleaned fish your fisherdwarf just caught can be cleaned (gutted) for consumption or cooking. If you plan to do any hunting or slaughter any animals, create a Butcher's shop on this level so animal corpses can be butchered. The fishery/butcher's shop can be placed behind the kitchen or the general food stockpile, for example. A door is recommended for the butcher's shop in order to contain Miasma should something rot, and to otherwise avoid offending squeamish dwarves.
Eventually go check out the subpage on Stockpiles for more information on fine-tuning these stockpiles for maximum efficiency. For now you can safely procrastinate on this and move on to the next section.
Placing Furniture[edit]
Once your furnishings are complete, you need to place them in rooms using the build command. Make sure each bedroom gets a door, chest, bed and cabinet. Put a door on the office (which should already have a chair and table). Put the new chairs and tables in the dining room. Make more doors and put them on other rooms if you want.
Once dwarves have hauled beds to the bedrooms, use q on the installed beds to define the actual bedrooms from them. Don't worry about assigning the bedrooms to specific dwarves; they will eventually pick their own as long as they have been defined as unowned bedrooms.
Meeting Hall[edit]
Use q on one of the tables you just placed in the dining room, define the area as a room, and configure it to be a meeting hall. This will cause idle dwarves to hang around in the dining hall. You want idlers in a central location, close to where you will be placing your emergency drawbridge levers. You may want to go remove the temporary meeting area and any other meeting areas that you created earlier (with i).
Checking Supplies[edit]
Before turning on either hunting or fishing, examine the units screen to see if there are any dangerous critters your hunters/fishers need worry about. With hunting especially, you may need to check this screen frequently.
Use the z (status) screen to check your stock levels. How much food and booze do you have left? You only have unprepared food at this point, and the booze you brought with you, but soon you will be making more. If you are running low on food, you can designate gathering some outdoor plants, slaughter some animals, turn on fishing, or turn on hunting to tide you over for a bit. Hunting and slaughtering animals both require a butcher's shop.
Brewing and Cooking[edit]
Once your first crop of plump helmets starts to come in, you will want to start brewing as a repeating task. Also, now would be a good time to start cooking actual meals rather than forcing your dwarves to eat raw food. Cooking easy meals will train dwarves faster, but they may be happier with lavish meals. So, you might want to cook easy ones until your cook or cooks skill up to a certain point then have them start making lavish meals. Prepared food is cooked from two (easy), three (fine), or four (lavish) raw food/alcohol ingredients. Each prepared food item will be called a something "biscuit", "stew", or "roast" depending on the lavishness of the meal.
Some things absolutely require wood (like beds and charcoal), but others can be made out of more common materials like stone. For this reason it's best, especially in the beginning, to make everything that you can out of stone. For example, you could make wood chests and barrels, but stone coffers and rock pots would let you save wood for things that require it and help you rid yourself of all that stone. And if you decide you want solid gold chests or something later when you have more resources, you can always throw out the rock coffers.
Speaking of booze, in order to keep the booze flowing, you will need to create some barrels, or some stone pots. Your dwarves should have emptied a few barrels by now to get you started, but you will definitely need more. A lot more. If you have an abundance of trees, then you can designate some more for cutting, and have your carpenter make a bunch of wooden barrels, but it may be more prudent to make a Craftsdwarf's workshop, make sure someone has the Stonecrafting labor enabled, and build a bunch of rock pots. (Rock pots are essentially barrels made of rock.) And don't worry that you've made too many; you almost can't get enough of them.
Keep checking your food and drink stock levels on the z screen periodically. While cooked food (properly stockpiled) and alcohol don't spoil, there is really no need to stock 2,000 units of dwarven wine at this point. Ten times the number of drinks and meals as you have dwarves is more than enough. If you start running out of food or drinks, designate some wild plants for harvesting, slaughter some of your animals, start hunting or fishing, or start more farms.
Actually, now would be a fine time to make another three by three farm. Set it to produce sweet pods in the spring and summer, cave wheat or pig tails (your choice) in the fall (autumn), and plump helmets in the winter. Having multiple types of plants will give your dwarves more variety in their food and drink, keeping them from grumbling.
Storage Space[edit]
Check out the Stockpiles sub page for more information on fine-tuning your stockpiles, especially in the food production area. This is somewhat complicated and it can safely be skipped if you don't feel like tinkering with stockpiles right now.
You should probably start making some wooden bins to help you store more stuff in less space. You might not need them yet, but you certainly will later. Bins are somewhat like barrels/pots, but they can store things other than just food and drink. Bins will also reduce the amount of labor needed to haul things to your trade depot or other stockpiles. So designate some more trees to be chopped down and queue up some bins. As with barrels and pots, you almost can't have enough bins.
Beyond a Minimal Fortress[edit]
By now you should have your main entrance created, along with a farm, general purpose stockpile, refuse pile (for trash), and trade depot. Somewhere you should have a mason's shop, a mechanic's shop, a carpenter's shop, and a jeweler's shop, surrounded by appropriate storage piles with garbage zone (for excess stone). You should also have a furnished dining area with kitchen, still, and food storage, and a residential area with furnished bedrooms and an office. You should have selected your administrators, and might even have an optional fishery, butcher's shop, craftsdwarf's workshop, or other stuff.
At this point, you have all the components of a minimal but functional fortress! Your next steps will be to make it safer and better protected, to set up your metal industry, and later to prepare your militia.
Preparing for Immigrants[edit]
Soon you should get some immigrants if you haven't already. When you do get a group of immigrants, take a headcount and queue up enough beds, doors, cabinets and chests to make bedrooms for them all. Examine their skills. (This is where Dwarf Therapist can come in handy again.) Be sure to enable any labors that they have skills in, but aren't active. Turn any useless dwarves into furnace operators.
Traps[edit]
Start producing mechanisms at your mechanic's workshop. Queue up ten. After they are built, use them to create stone fall traps near the start of your entry hall using b-T. Queue up some cages, and more mechanisms, and use these to create some cage traps right after your stone traps. Cage traps are incredibly effective at stopping ambushers, but traps in general will not protect you from thieves and kidnappers who will almost always bypass them.
Continue to fill up your entry hall with alternating rows of stone and cage traps as the parts become available.
Guard Animals[edit]
Create two 1x1 pastures near the beginning of your entryway, one on either side, using i. Using the N key inside the zone interface, assign a dog or other non-grazing animal to each of them. These animals will spot thieves and raiders before they gain entrance to your fortress. Try to pick disposable animals, as they will be slaughtered by the first ambush raiders. Ideally, don't assign female animals; you want them safe for breeding.
Drawbridge[edit]
Build a drawbridge (b-g) to seal off your entryway. Make sure to use w, a, d, or x to make it raise up in the right direction; otherwise it will just retract (disappear) instead of raising up to form a barrier.
Put the drawbridge between the trade depot and the hall-o-traps so you can lock things out of the trade depot and the rest of the fort. Build a lever (b-T-l) near your meeting area and connect it to the drawbridge by using q on the lever.
In case of an ambush or siege, you will want to close up your fort, keeping the goblins out until your squads have formed up and are in position. Ideally you want to have enough cage traps to take out most of the goblins so your military will only have to mop up.
Metal Industry[edit]
Now, below your first workshop level, dig out four more 5x5 rooms around the stairwell. Three of these will be smelters, and one a metalsmith's forge. Designate stockpiles for bars around the smelters and forge. The bar stockpiles will hold coke and charcoal and metal bars. You will probably need larger bar stockpiles, but you can dig out more space and expand them later.
Also dig out some space and create a stockpile for ore somewhere nearby. To make an ore stockpile, designate a stone stockpile, then use q to change the settings on it to forbid all types of stone other than ore.
Finally, go to your general purpose stockpile on the top level and use q to disable Bars. Stone should already be disabled on this stockpile, and if so then ore is already disabled for it.
Wood Burning[edit]
Somewhere near your carpenter's shop, near your wood stockpile, dig out an area and build a wood furnace. Hopefully, you will find enough lignite or bituminous coal that you will only need to use the wood furnace to create enough charcoal to jump-start the coke (refined coal) production. Without magma, you need to refine raw coal to make coke, or burn wood to make charcoal. Unprocessed coal is not a usable fuel; only refined coke and charcoal are.
If you don't find coal on your map, you'll need to either dig down to magma or make charcoal out of wood to run your forges and smelters, but don't worry about this yet. You need to do some digging around.
Mining[edit]
New players who don't have a degree in geology usually find themselves confused as to what all these mineral names mean. In DF you'll never strike "iron ore" but you will strike magnetite or limonite which are ores of iron. If you don't know that these things are ores of iron then it obviously won't occur to you to try to smelt iron. Note that ores usually look like £ before they are mined and * after, though the colors will differ. See The Non-Dwarf's Guide to Rock to help you figure out exactly what you've found.
At this point you want to start looking for metal ore. You may have already found some while digging out rooms, in which case you can just mine into the walls of the rooms to get more ore. If you haven't found ore yet or you want to see what else you can find, you will need to dig exploratory tunnels looking for ores, minerals, and gems. For now just start digging tunnels out from your stairwell or rooms in all directions and see what you run into. Note that digging into damp stone or warm stone is not recommended as those areas may be holding back water or lava which can flood your fort.
Fuel[edit]
Whether you find coal or not, you will need to burn wood into at least one unit of charcoal. If you find some coal (lignite or bituminous coal), start your smelters out processing it into coke using your charcoal to get things started. From then out you can burn coke to make more coal into more coke and so on.
Put these coke-making jobs on repeat. Only use one smelter to begin with, but you should be getting a group of immigrants fairly soon, if you haven't already, and you can put them to work in the other smelters.
Don't give up on finding coal right away. Dig around for a while and if you're starting to get impatient then burn some more wood into charcoal, smelt some ore, and make some weapons. If you rely on charcoal for fuel then you'll be needing a lot of wood, so in that case dig out another room near the furnace and create a wood stockpile. You might also want to just remove a smelter, replace it with a wood furnace, and create the new wood stockpile down in the smelting area. Finally, go designate more trees for chopping.
Forging[edit]
If you don't find coal then you will have to continue to burn wood into charcoal, or dig down to the bottom of the map and find the magma sea so you can power magma smelters and magma forges. Getting to magma can be difficult for various reasons that you will discover, so make sure you are ready for some trouble before you go that direction. Burning charcoal should work out ok in the short term.
Once you have smelted some ore to get metal bars, and have additional bars of either coal or charcoal, you can start forging metal items. Here are some suggestions on what to make first:
- Picks - You may have only started out with one pick which limits the number of miners you have to one. By this point you are probably wishing you had more miners. Make a few picks and give some dwarves the mining labor once you get some immigrants. It doesn't matter what metal you use to make picks, at least when it comes to mining, so even copper is perfectly good.
- Weapons - Picks actually make pretty good weapons, but there can be some issues equipping them because they're tied to the mining labor. You may want to make a few axes. They make good weapons, at least against most lightly armored opponents you're likely to encounter first, and can be used to chop trees. Start with 5 or so.
- Armor - You're going to want some armor. Start with shields, breastplates or mail shirts, helmets, leggings, then gauntlets and boots. Start with 5 or so of each in the order listed.
Steel is the best normal metal to make armor and most weapons out of, but you'll likely find that you want some arms before you can make steel. Iron is good, bronze is also good. Copper is not ideal, but it still works and is better than no metal weapons/armor at all.
Gemcutting and Trinkets[edit]
You should have uncovered some gems by now, so put your jeweler to work cutting them. These will be the only thing you trade in the first year, and only for things you absolutely need and can't produce enough of yourself.
Actually, stone crafts produced by a craftsdwarf can make good trading goods as well. The only problem with this is that you'll need to make a lot of them (50+) because each one isn't too valuable individually. If you go this route you will probably need to dedicate a craftsdwarf's workshop and craftsdwarf to this task almost full-time, but you're very unlikely to ever run out of stone.
Sticking to the Plan[edit]
Say one of your new immigrants turns out to be a legendary weaver. Should you plant some pig tails and create a loom for him? No! Put his legendary ass to work smelting metal or something that's part of your current industry even though he has no skill at it. Do not split your efforts yet. You can make use of his unique talents later when you can afford to diversify your industry.
Metalsmithing will be your primary economic activity, with cutting gems (and possibly making stone crafts) being used to give you some short-term wealth until the metal industry gets going. This means you will need miners, haulers, smiths and furnace operators. Unless a dwarf is doing something else vital to the proper functioning of your fort, such as training in the militia, making traps, cooking food, and so forth, they should be doing one of those four things.
Wealth and Invasion[edit]
Creating too much wealth initially is a sure fire method of pulling down a goblin ambush that you are ill-equipped to deal with. Titans will also start attacking you should your wealth go over a certain amount. For this reason, spend no time smelting gold, smoothing, or engraving anything yet. Most of the wealth you create in the beginning should be the sharp pointy kind.
You may have struck gold or some other valuable metal, and you may be tempted to put your furnaces and smiths to work creating valuable metal crafts. Don't do it! Until you have your militia formed and fully equipped with armor and weaponry, your smelters and forge should be doing nothing else but smelting cheaper materials like coal, iron, making pig iron and steel if possible, and making weapons and armor. Making steel will actually increase your wealth quite a bit, but at least you can stab and beat things to death with steel; you can't make weapons from gold.
Military[edit]
Your military is an important part of fortress defense. Unless you have totally cut yourself off from the outside world then you will want at least some sort of military.
Once you reach this point you should hopefully have enough dwarves to start a small military training program. You will need at least 5 dwarves who aren't otherwise doing anything important.
If you don't have any spare dwarves yet, or just don't want to mess with it yet, just skip to the next section and come back to this later. Don't wait too long to set up your military though; you especially will want soldiers before you reach a population of 80 dwarves. (You will find out why.)
When you're ready to start up your military, see the Military quickstart guide.
What Next[edit]
Congratulations! If you've made it this far then you have a self-sustaining fort going and can now start to branch out into whatever you are interested in exploring. Expect some goblin invasions, forgotten beasts, titans, dragons, giants, and other creatures to interrupt your activities at various points. This is part of the fun.
Here are some things that people almost always do eventually though not necessarily in any particular order (these are somewhat essential):
- Build coffins and a graveyard or tombs for dead dwarves and pets
- Set up a hospital
- Build a well
- Build a jail for unruly dwarves
- Set up civilian alerts to get civilians to a safe area during ambushes and sieges
Here are some things that players often do as their population grows:
- Smooth and engrave walls and floors
- Produce Meat, eggs, milk, and honey
- Continue to expand the military
- Explore new industries
- Dig down to the caverns and create a defended lower entrance with traps to defend the fort against the denizens below
- Build a kennel and train some war animals
- Build a Mass pitting system to dispose of caged enemies
- Build above-ground constructions such as an archery tower or garden
- Create a statue garden or zoo
- Farm in an above-ground farm plot
- Dig down to magma and set up magma forges and magma smelters to avoid the need for fuel
- Build machine components to pump magma and water
- Create more elaborate traps such as magma and drowning chambers
- Try some stupid dwarf tricks
You may also want to just read over the Fortress Mode Reference Guide and the many other very useful documents on the wiki to give you other ideas of what to do.
Keep in mind that how you play is not set in stone. Some people never defend, some start a megaproject right after settling, some never dig and just build an above ground castle or town using logs. Some never smelt ore, some start smelting as soon as they arrive. Some make their home in the dangerous natural caverns. Some deal with invaders by flooding the map or isolating themselves completely. And that's not even considering the mods and some of the crazier challenges that people have come up with. There's really no one "right" way to play DF.
Feedback[edit]
If you have any feedback on this guide, please leave a message on the talk page for this article or in this thread on the forums.
